
POST UPDATE: FIRST-TIME SUBSCRIBERS, USE DISCOUNT CODE “SAVVY25” TO SAVE 25% OFF ON RV LIFE PRO SOFTWARE SUITE. DISCOUNT CODE BOX FOUND ON DESKTOP VERSION, NOT ON MOBILE VERSION.
My wife and I became first-time RV owners in 2020, and we dreamed of taking a cross-country trip in 2021. As this was our first RV, I had a lot of questions about the travel logistics. You see, I am a planner. Whenever we take a trip, I want as many details nailed down before departing. When it was time to start planning our cross-country RV trip, I was a little overwhelmed. We were planning a three-month trip, not a one-week vacation. I estimated we would drive over 9,000+ miles pulling a 25-foot travel traveler. How was I going to find campgrounds? How would I find gas stations we would fit in along the way? I certainly did not want to travel on dirt roads or run into height restrictions. Determining the trip route seemed like a monumental task. I needed help.
I began researching tools to assist with my RV travel planning, and that is when I came across a software called RV Trip Wizard. When I visited their website, I read “The Best RV Trip Planner“. I continued to read “RV Trip Planning has never been easier. Save time, plan safe RV routes, find great campgrounds”. I liked what I was reading. Is this the solution to my trip planning concerns? I had to try it out, so I signed up for the free 7-day Trail. Over the next 7-days, I explored the software features. The more I used it, the more I could see how this software could assist with my cross-country trip. This software became instrumental in my planning!
Before going any further, I am an RV Trip Wizard Affiliate. I will receive a small commission if you click on any link provided and become a member. That said, I use this software every time I plan a trip and would not recommend a product I have not used.
You need a membership to use this software so I have included screenshots to show the features. If you are interested in this software, you can sign up for a free 7-day trial by visiting their website. This is a web-based software tool, and all data is cloud-based. An internet connection is required to use it.
To demonstrate, I will walk through an example of how I used the software to find campgrounds by inputting my personal data into the Trip Settings. For first-time users, your first step will be to set up your general information which may be changed, at any time, within the Trip Settings. Let me walk through my Trip Setting and show you this important step. Doing so provides valuable information when planning your trip and is the reason why I use this software extensively.
Trip Settings are located by clicking on the wrench (Trip Tools) in the Trip Area.

I have a 2020 Coachmen Freedom Express, Model 204RD. On the Trip Settings Page under RV Info, I enter my Height, Length, Weight, and other relevant information.
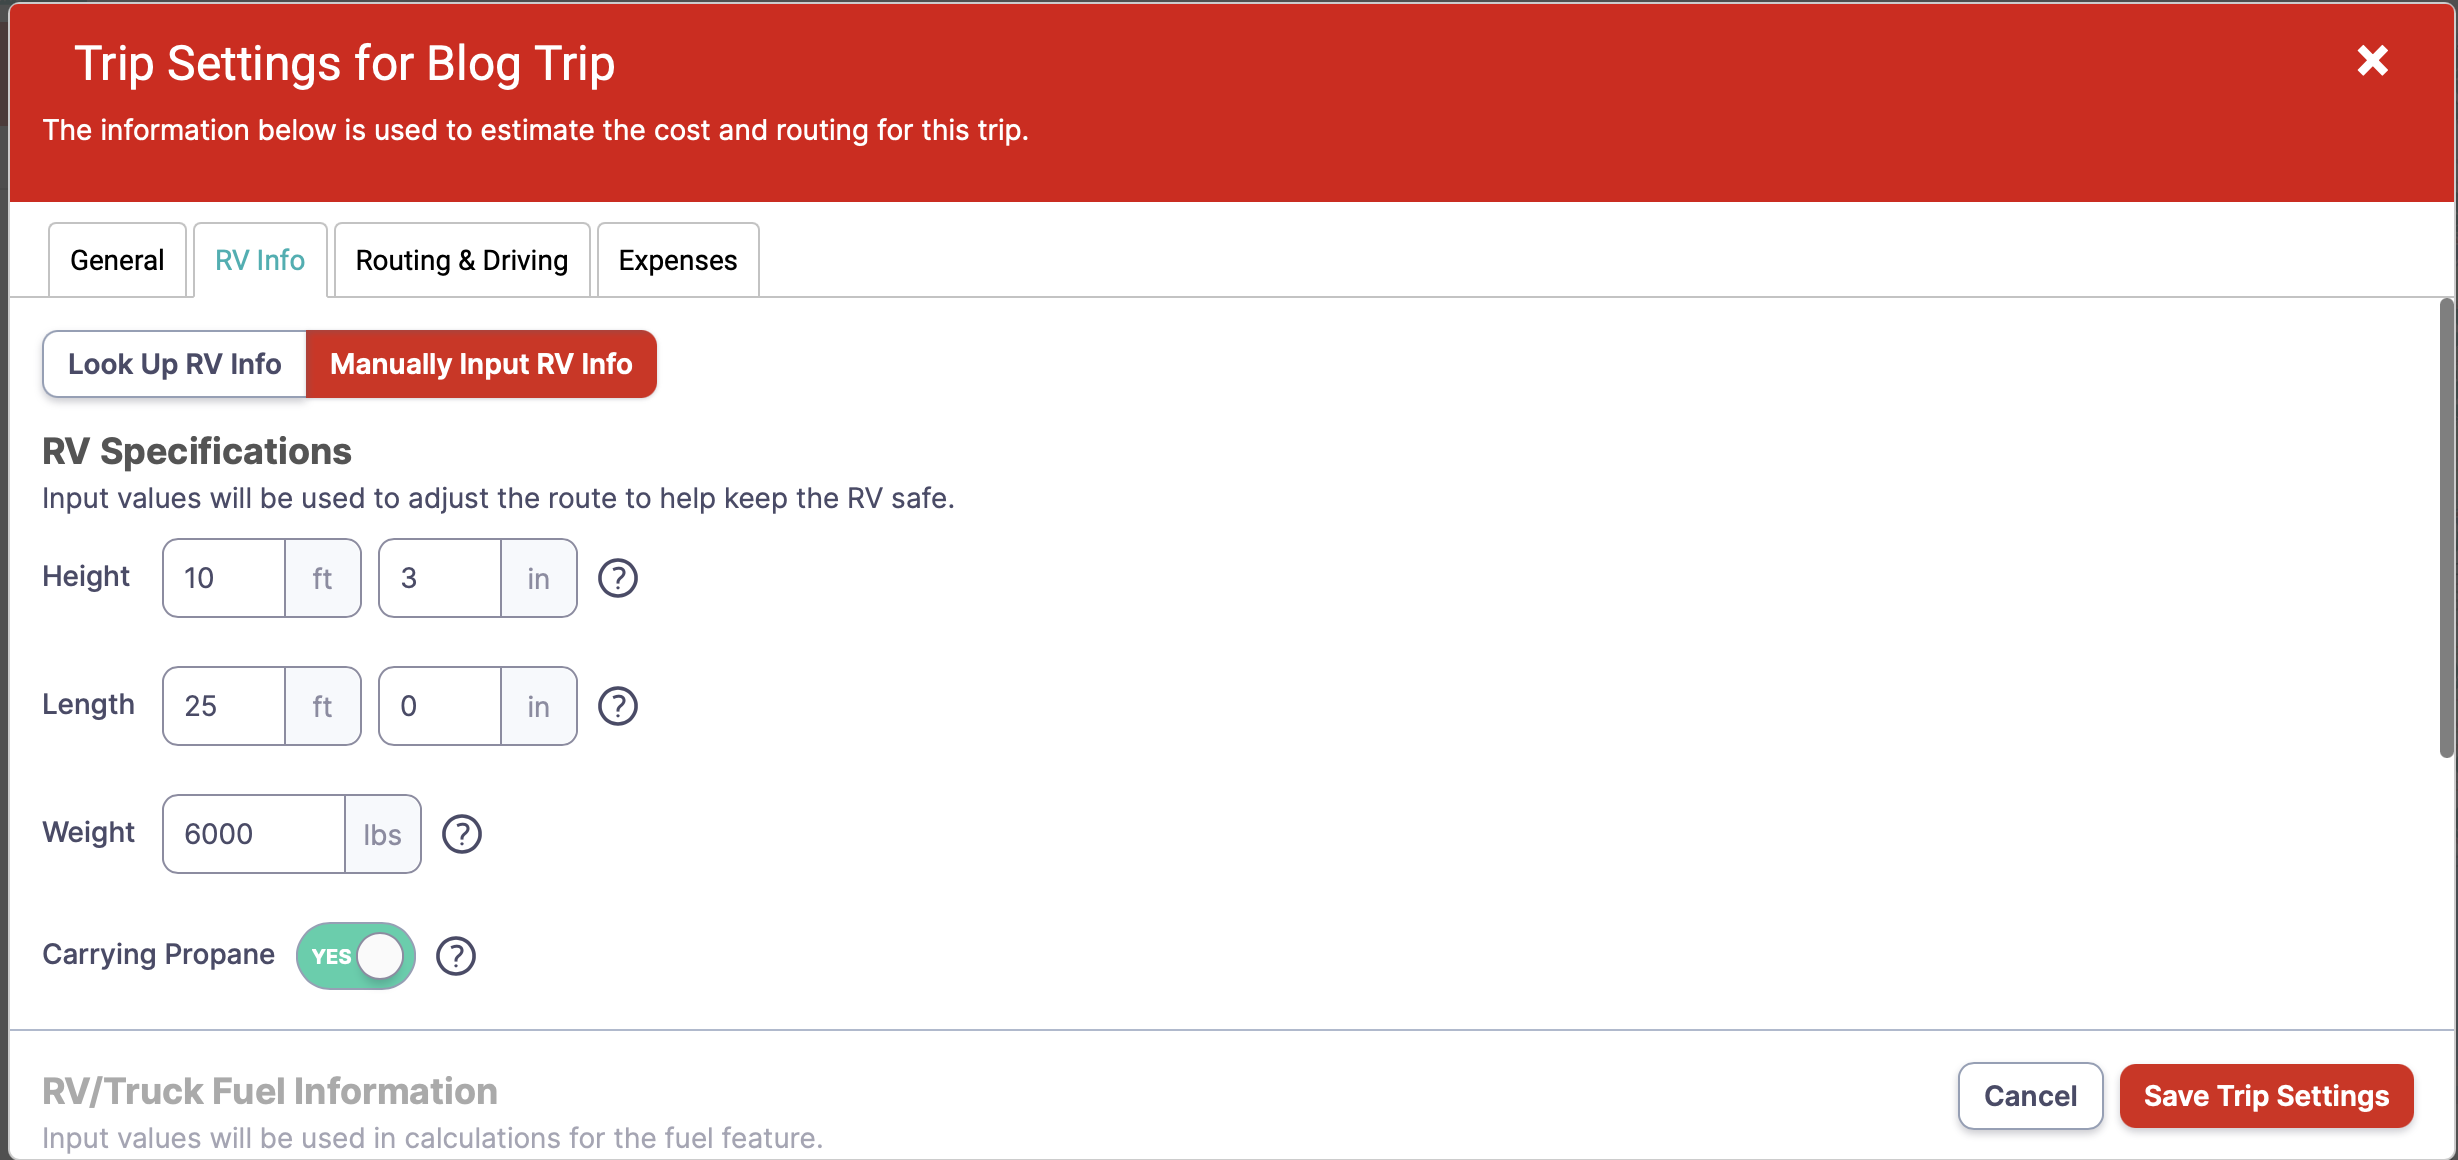
Scrolling down this page, I enter my Fuel information, which is necessary if you wish to use the Low Fuel Indicator feature. This feature will display a Low Fuel Indicator on the map once you reach your fuel reserve. As you can see, I enter Fuel Reserve as 6 gallons. The software will calculate the location of the Low Fuel Indicator based on your Fuel Capacity and miles driven along your route. In my case, I will see a “gas pump” every 200 miles (10 mpg x 20 gallons of fuel used), assuming I stop and fill up every 200 miles. More on this later.

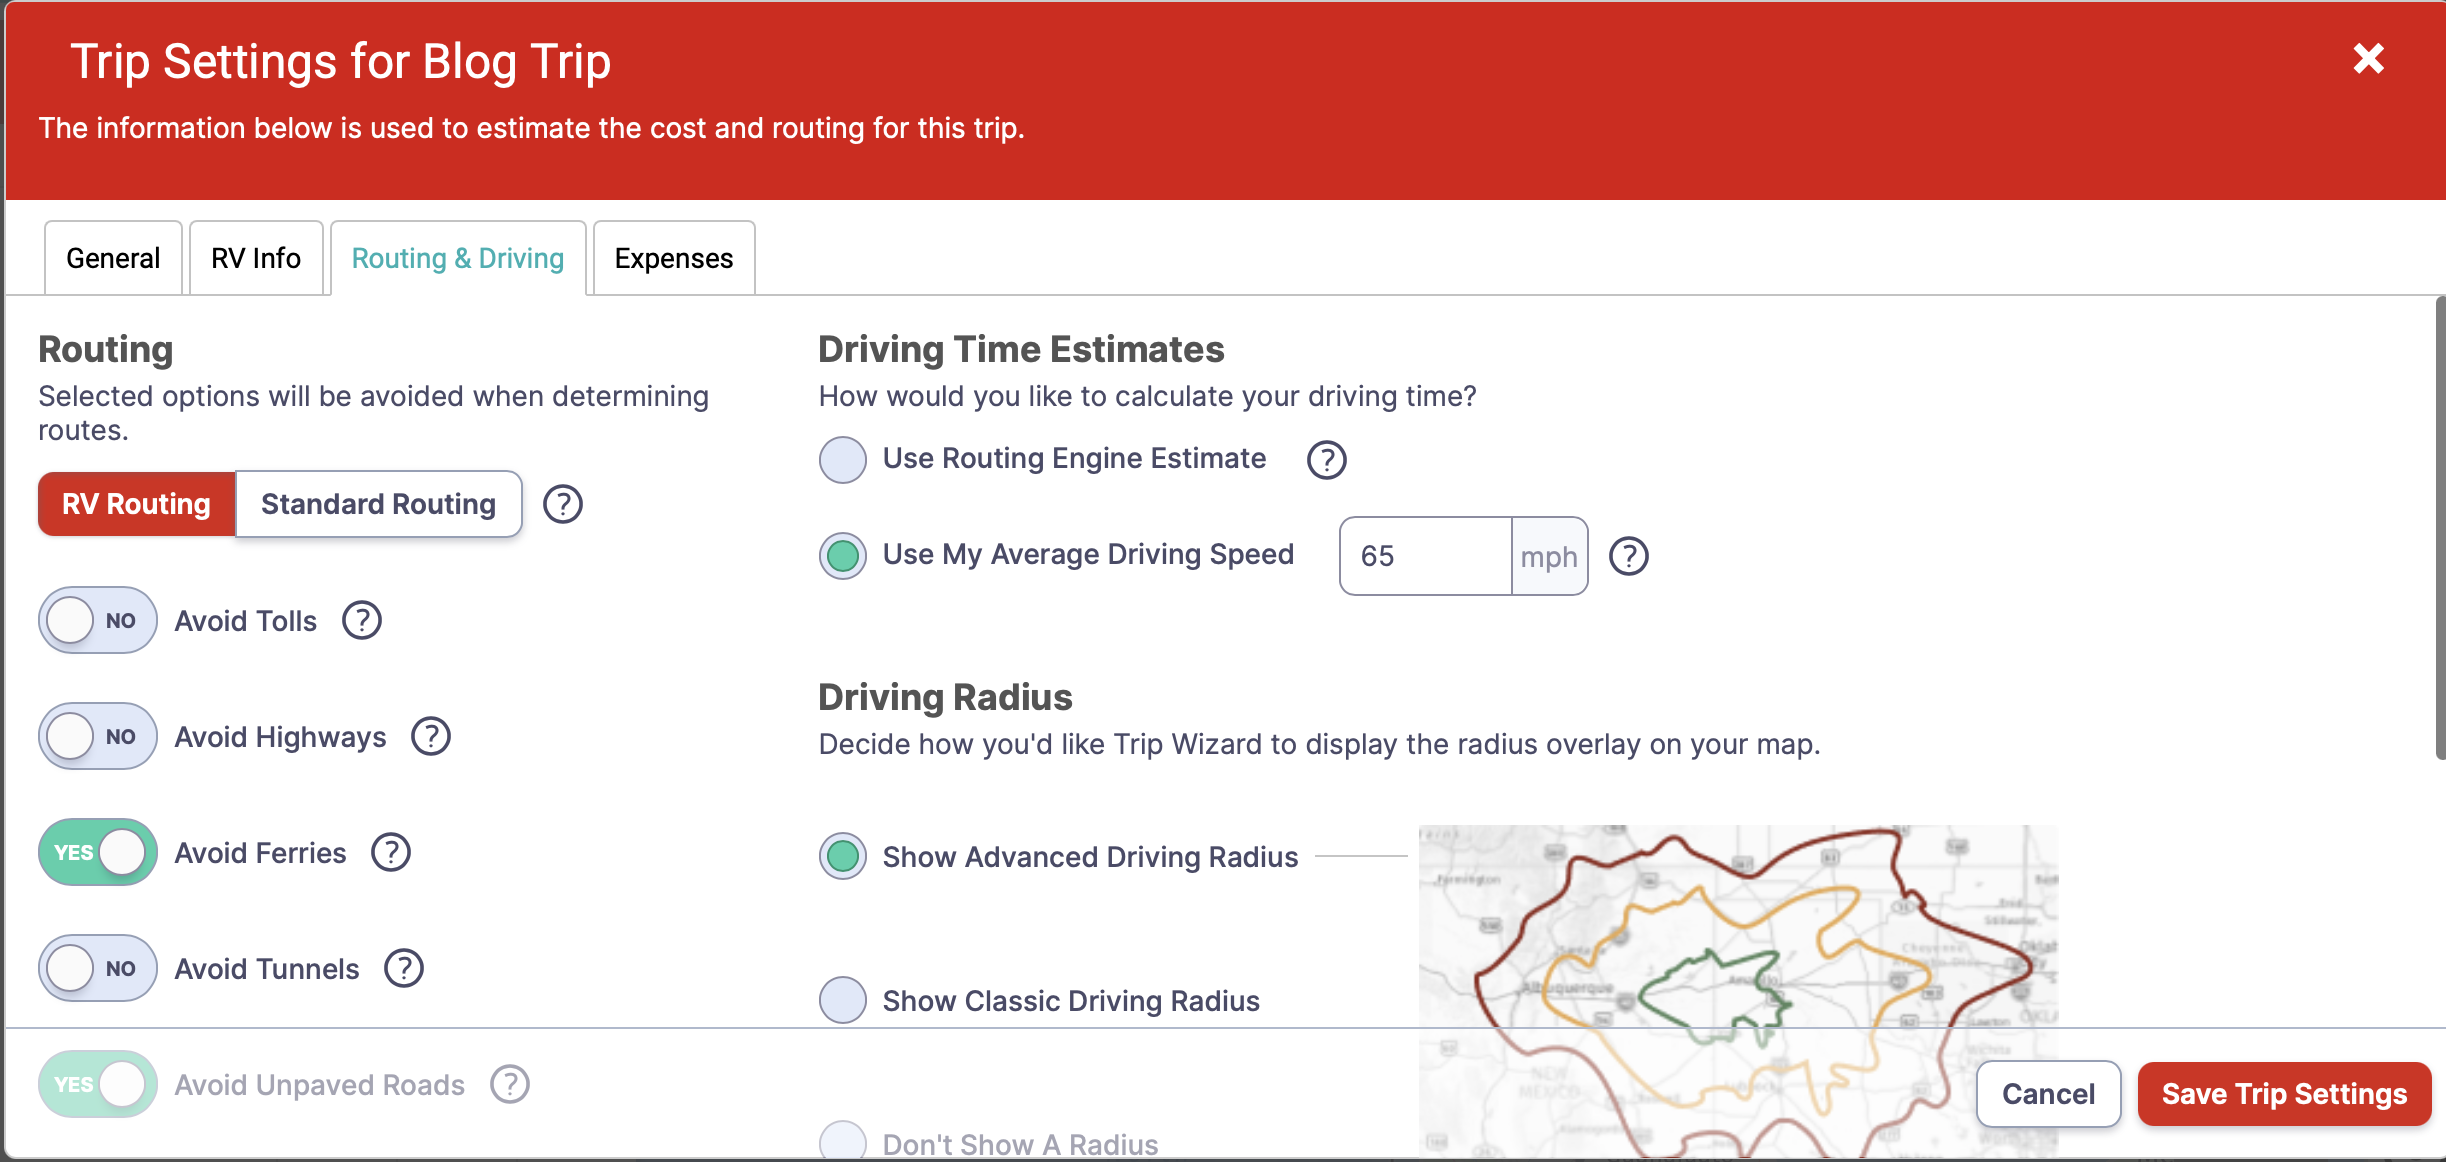
The next tab is Routing & Driving. Complete the information to make use of additional features within this software. The data I entered here is the most important data for travel planning. I click Use My Average Driving Speed and enter 65 mph to estimate my Driving Time. For Driving Radius, you have several options. I prefer Show Advanced Driving Radius.
As you scroll down the page, I chose Driving Distance where one can enter three distances, and I enter 200, 300, and 350. My reason for choosing these distances will be covered below.
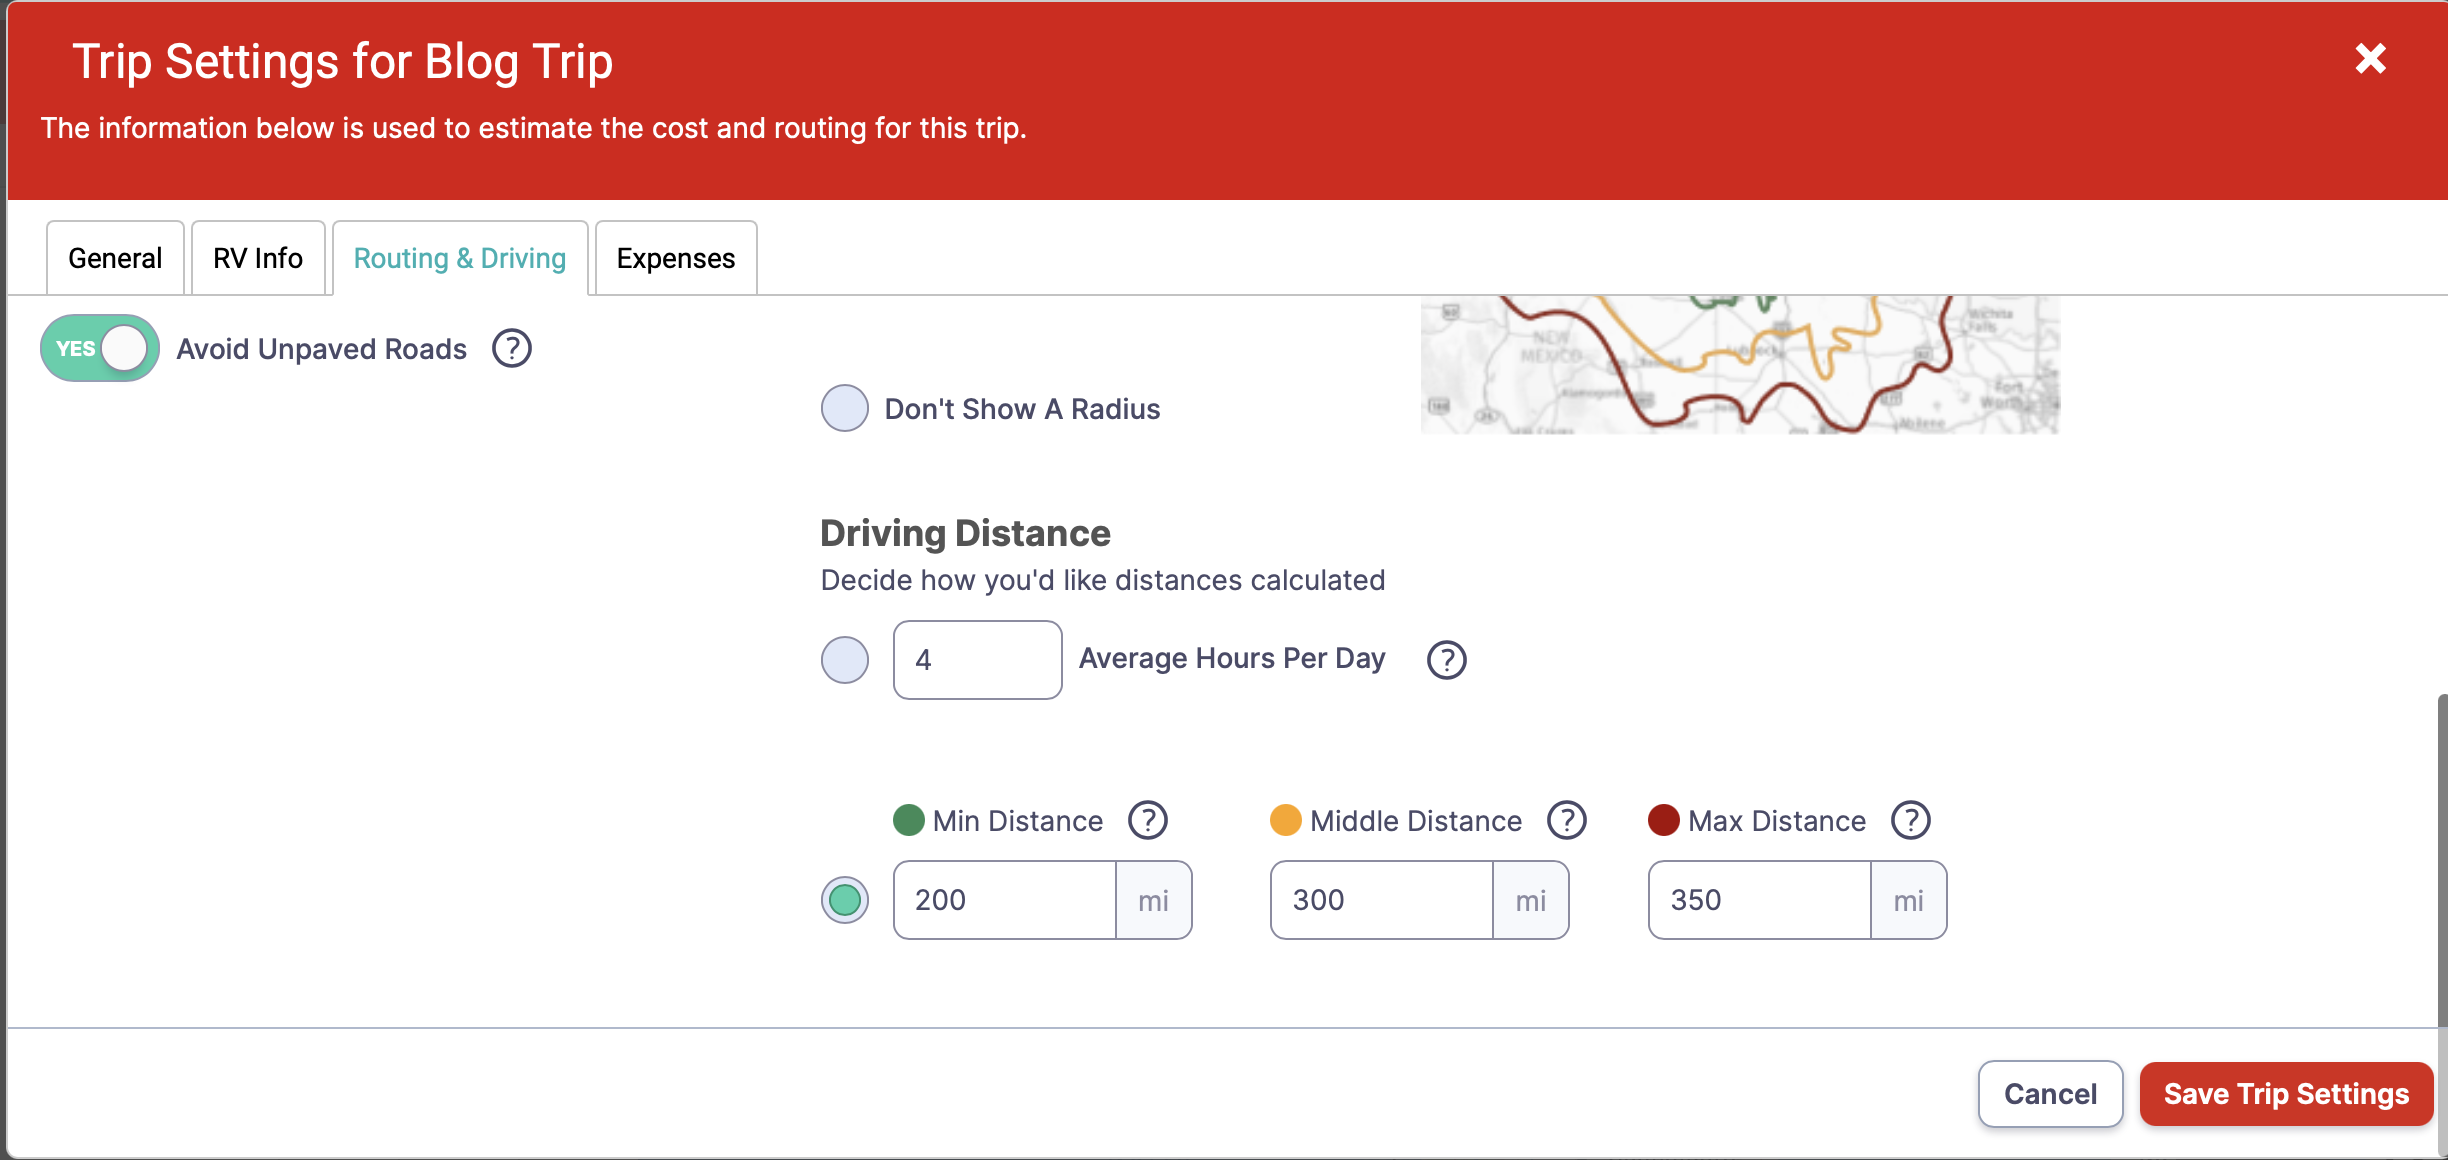
You have an option to choose a single Radius by clicking Average Hours Per Day and entering a value. As you can see I have a value of 4, but I prefer the three distances, which will provide three radiuses. By selecting the three distances, I will be able to see, on the map, where I will end up each day and estimate how long it will take me to travel those distances. Given my average speed of 65 mph, I figure my driving time to be 4.5 to 5.38 hours to complete 300-350 miles, the most I prefer to drive on a given day. In reality, 5.38 hours turns out to be about six-plus hours as towing an RV just takes more time. I can adjust the values later and “fine-tune” them based on my driving experience over time. This will all make sense once I show the map in later steps.
You can continue to the Expenses tab to enter additional information such as Average Cost Per Gallon, Camping, and Meals costs to get a better picture of a trip’s estimated costs. For this example, I will skip this step.
With the RV Information and Routing & Driving information data entered, one can start planning their trip.
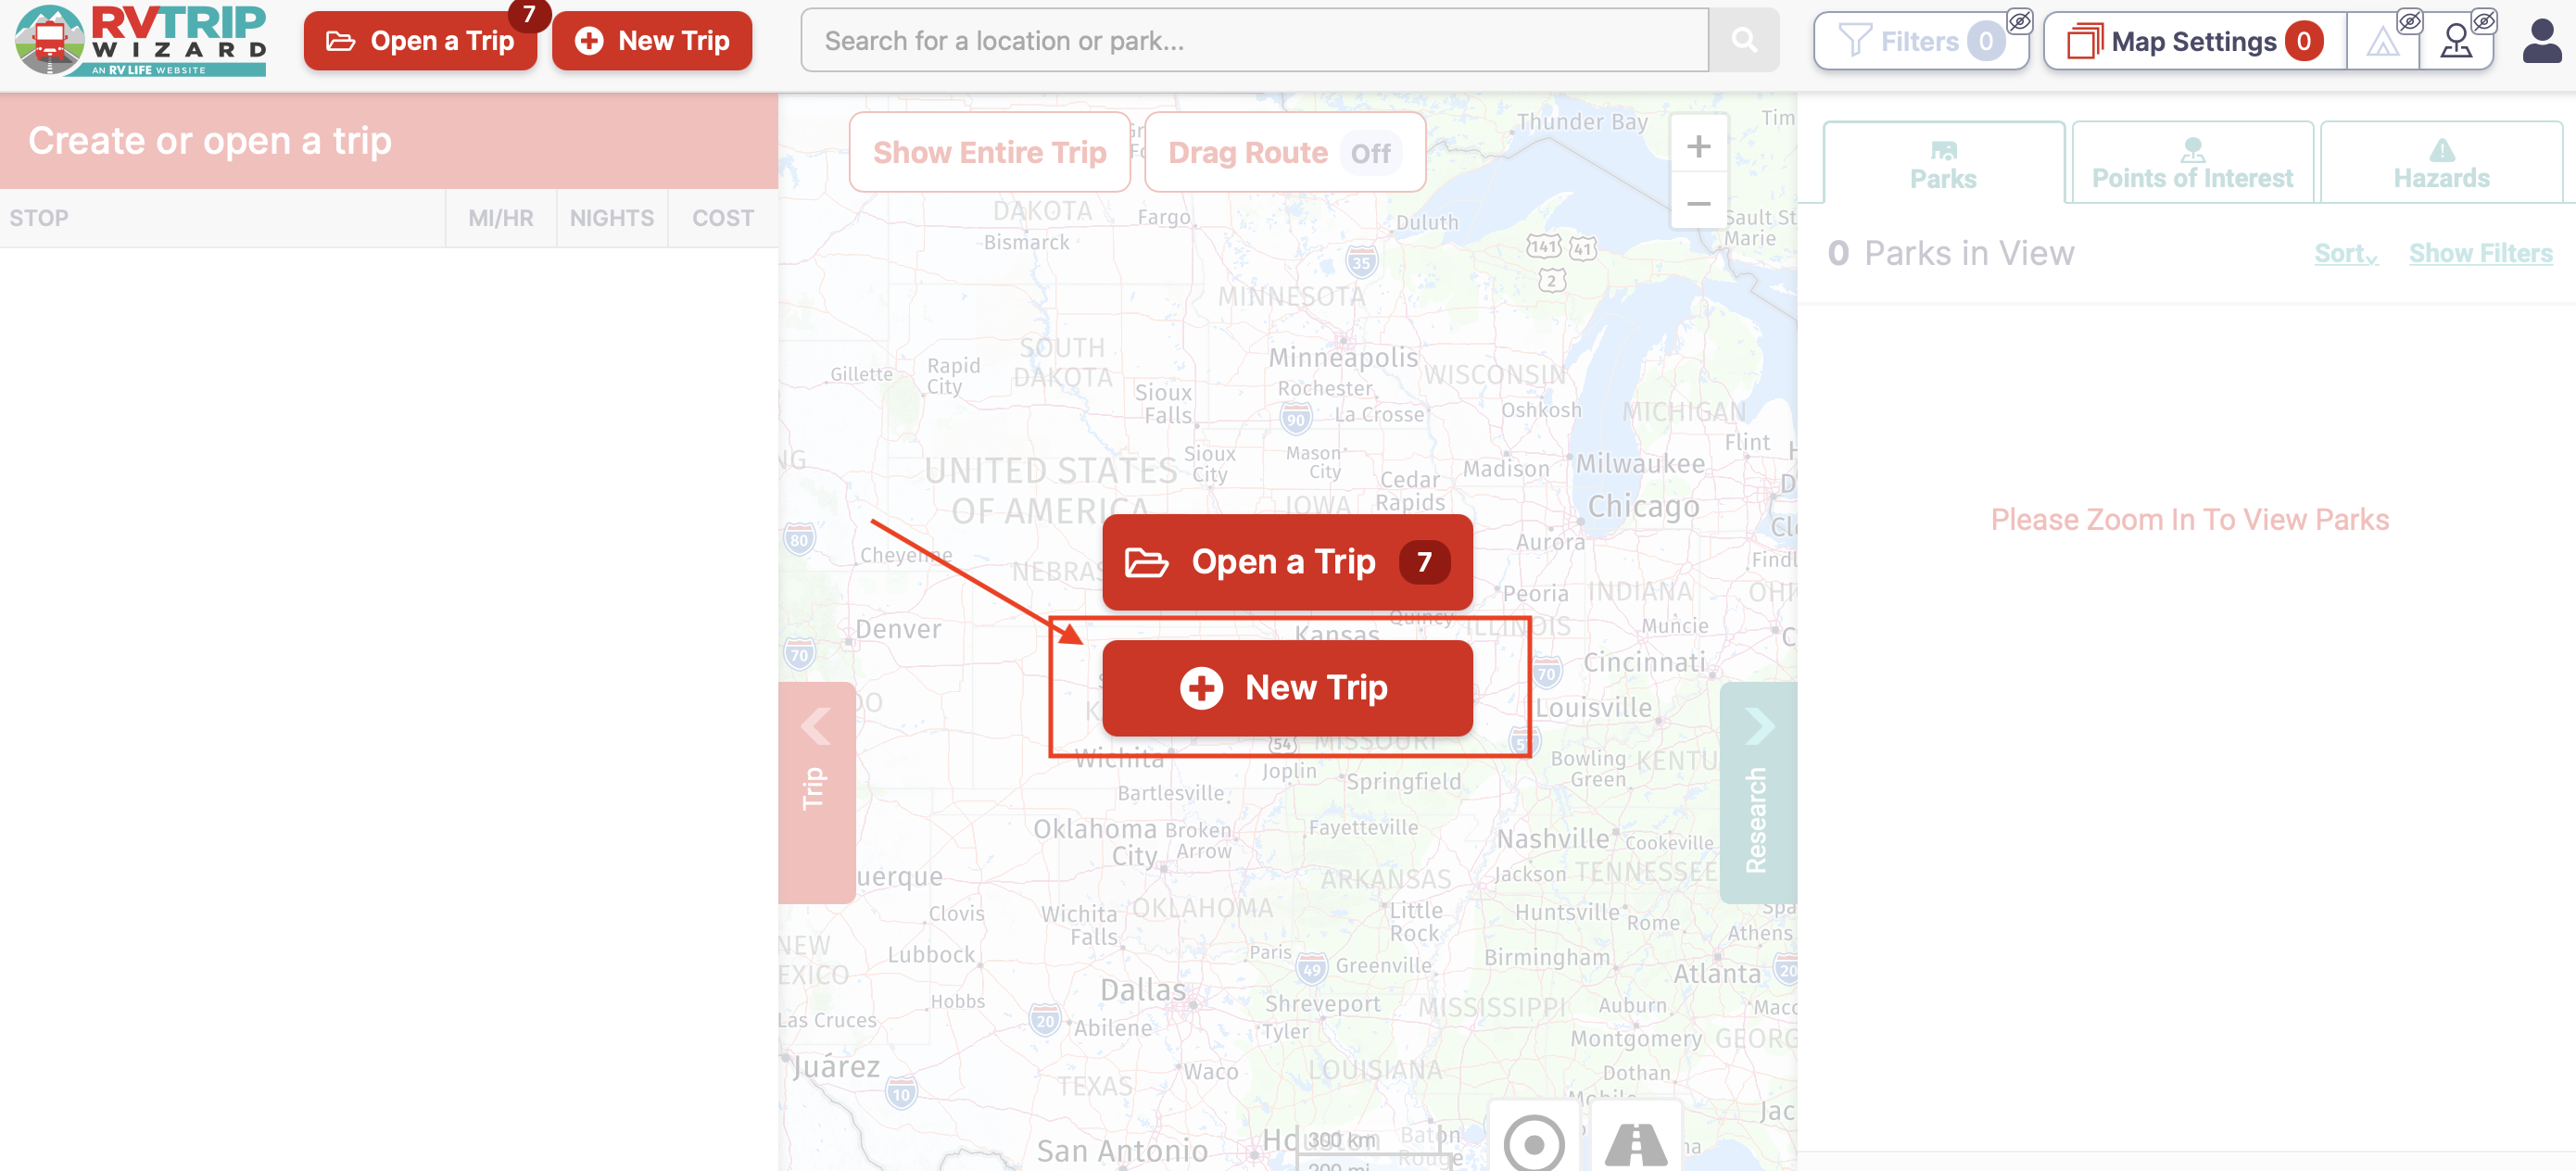
The next time you login into your account the first window to pop up will be a window requesting you to select Open a Trip, one you already created, or create a New Trip.
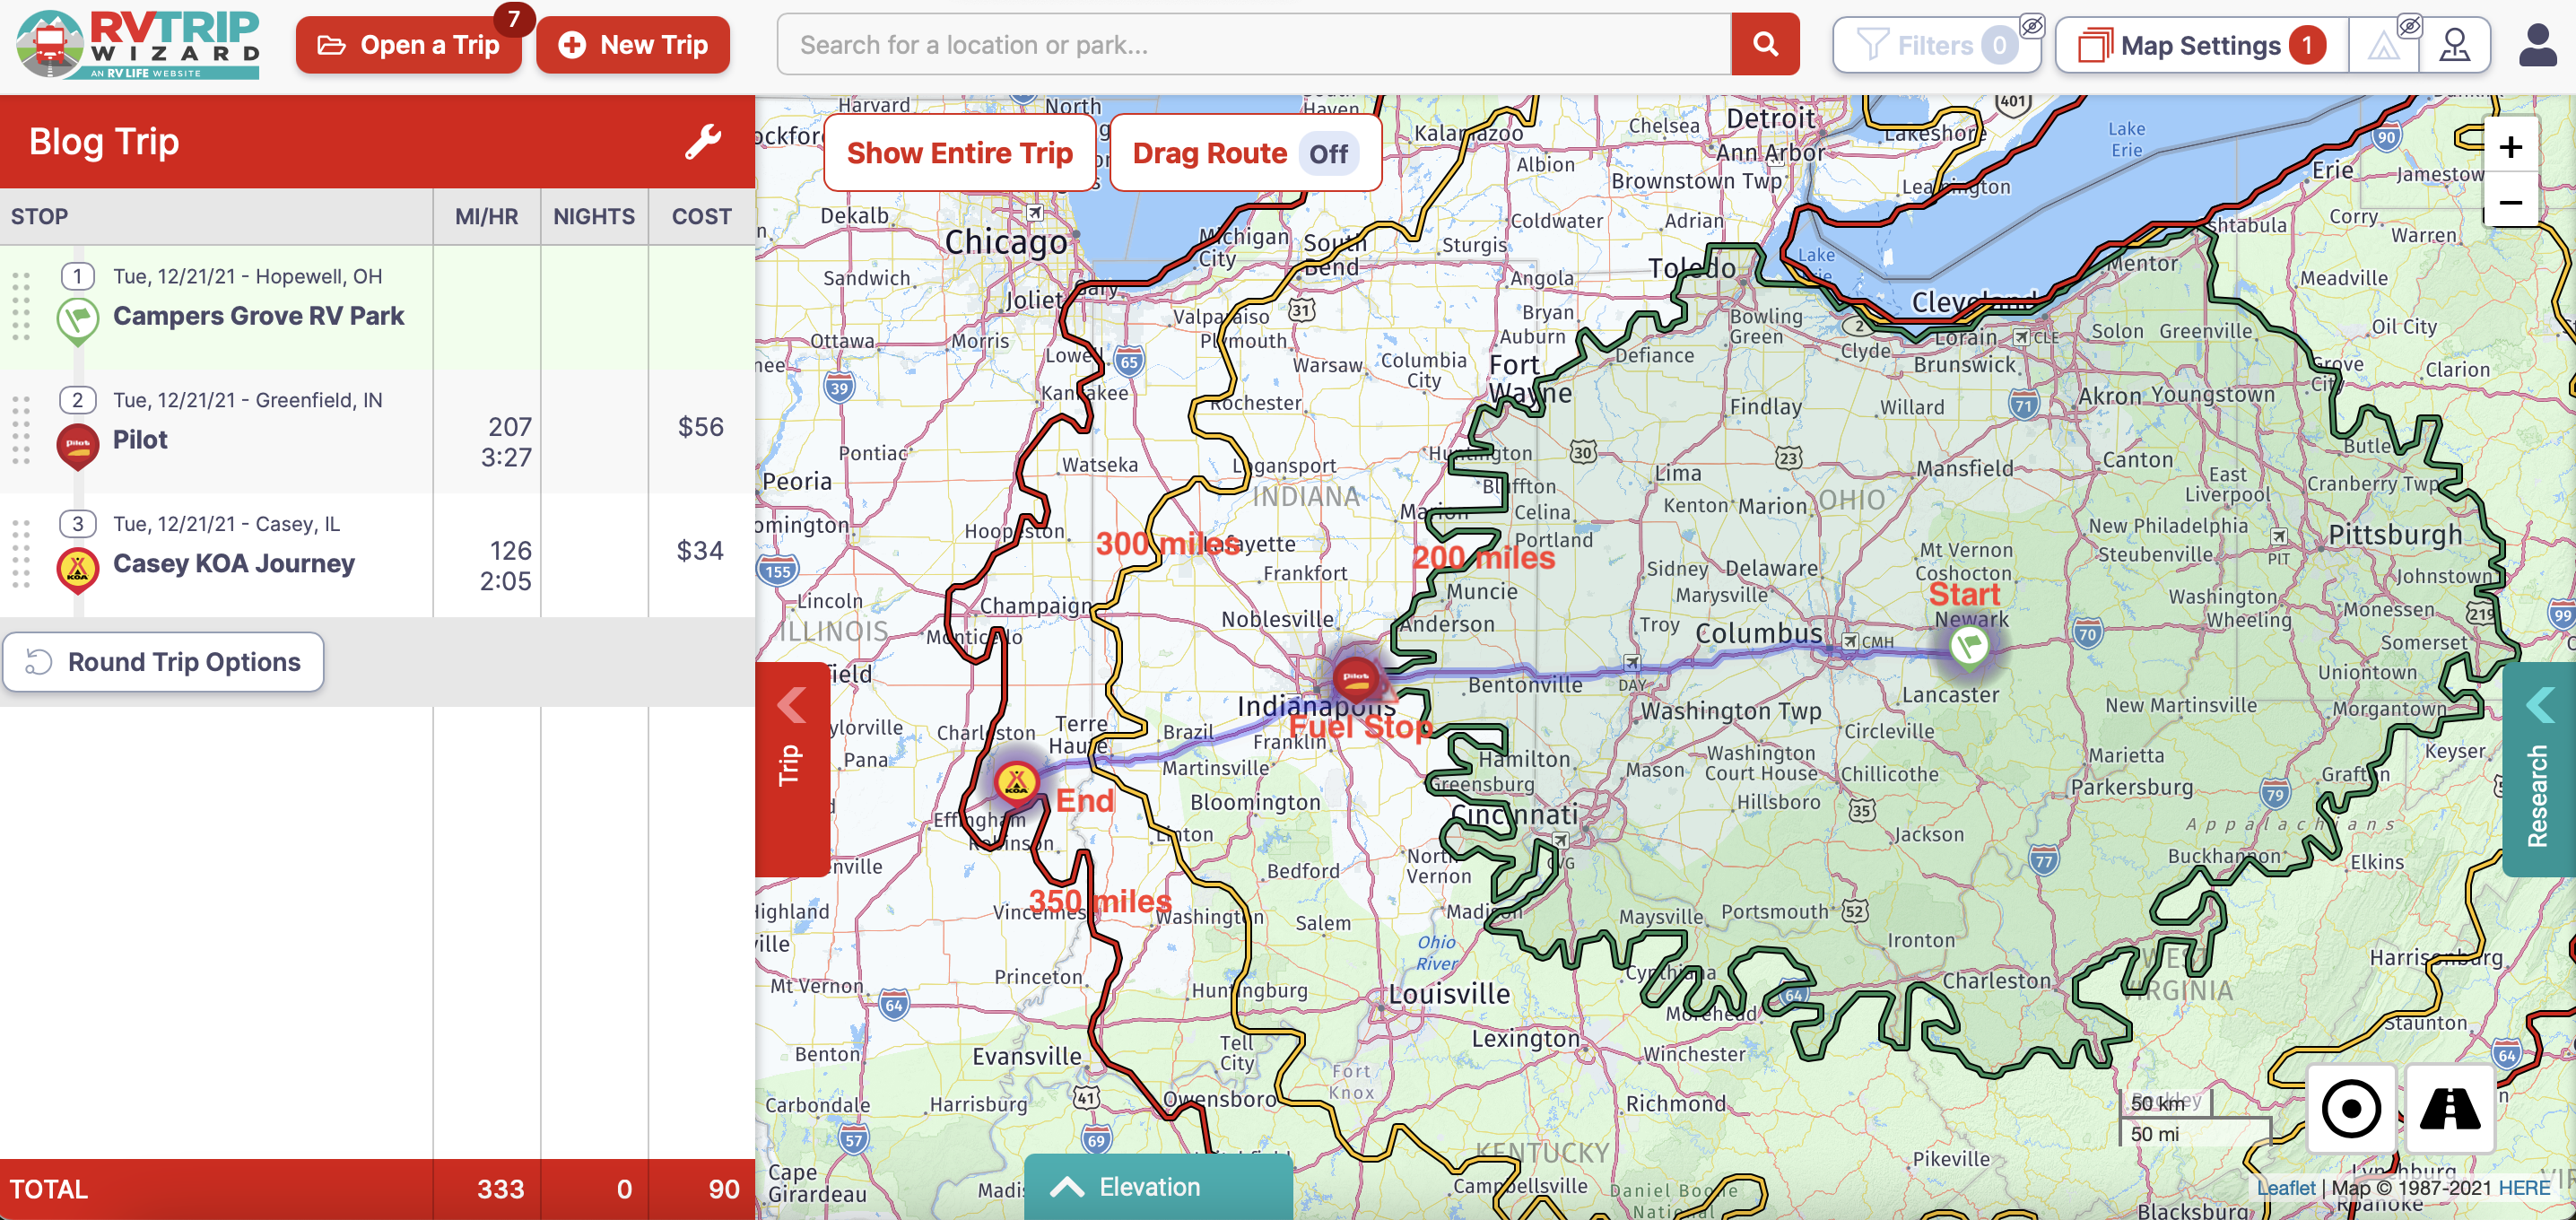
In this example I will walk through how I used the software to plan one leg of our trip. I followed the same process for each leg, refining it over time until our route was complete. For this example, I will start at Campers Grove RV Park in Hopewell, OH.
In this case, I choose New Trip. A new window will pop up. This is where you name the trip and select the date you are leaving, if desired. I will call it Blog Trip and choose 12/21/21 as a start date and click Create.
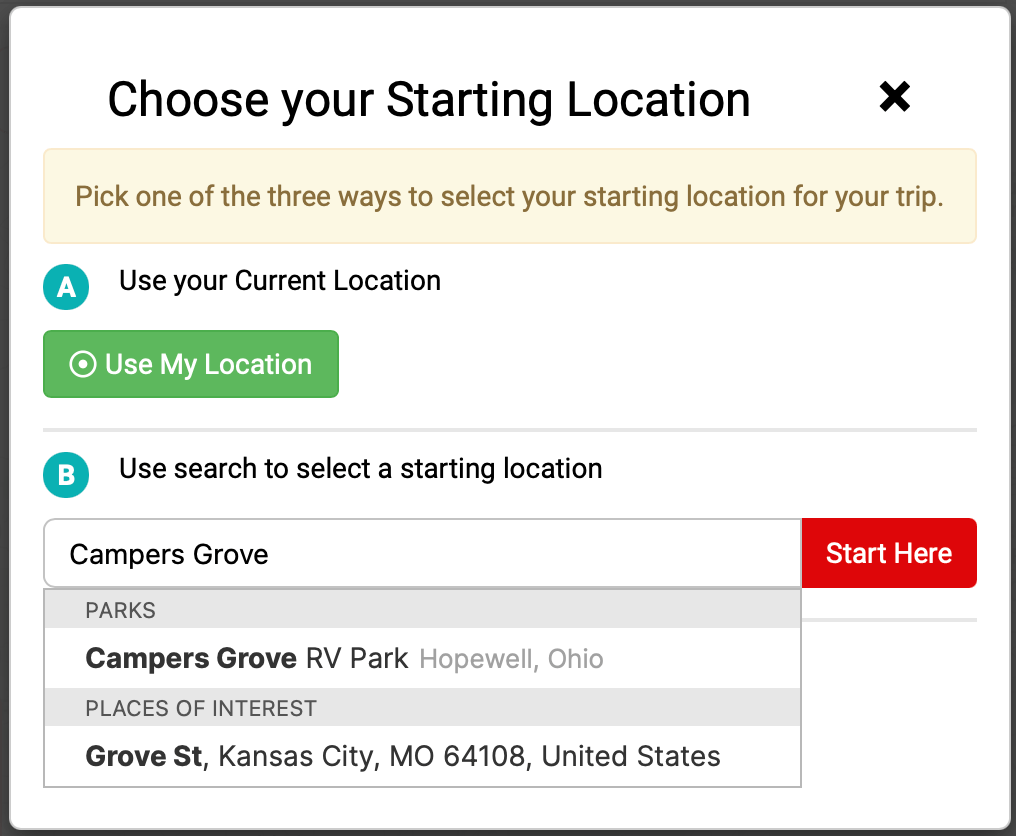
Next, you enter your starting location, several options are provided. I will choose to Use Search to select a starting location and enter Campers Grove in Hopewell, OH. As I begin to type in the location, the software will begin loading locations, from the list I select Campers Grove RV Park Hopewell, Ohio, and then click Start Here. I am now at the main page and can begin planning my next stop.
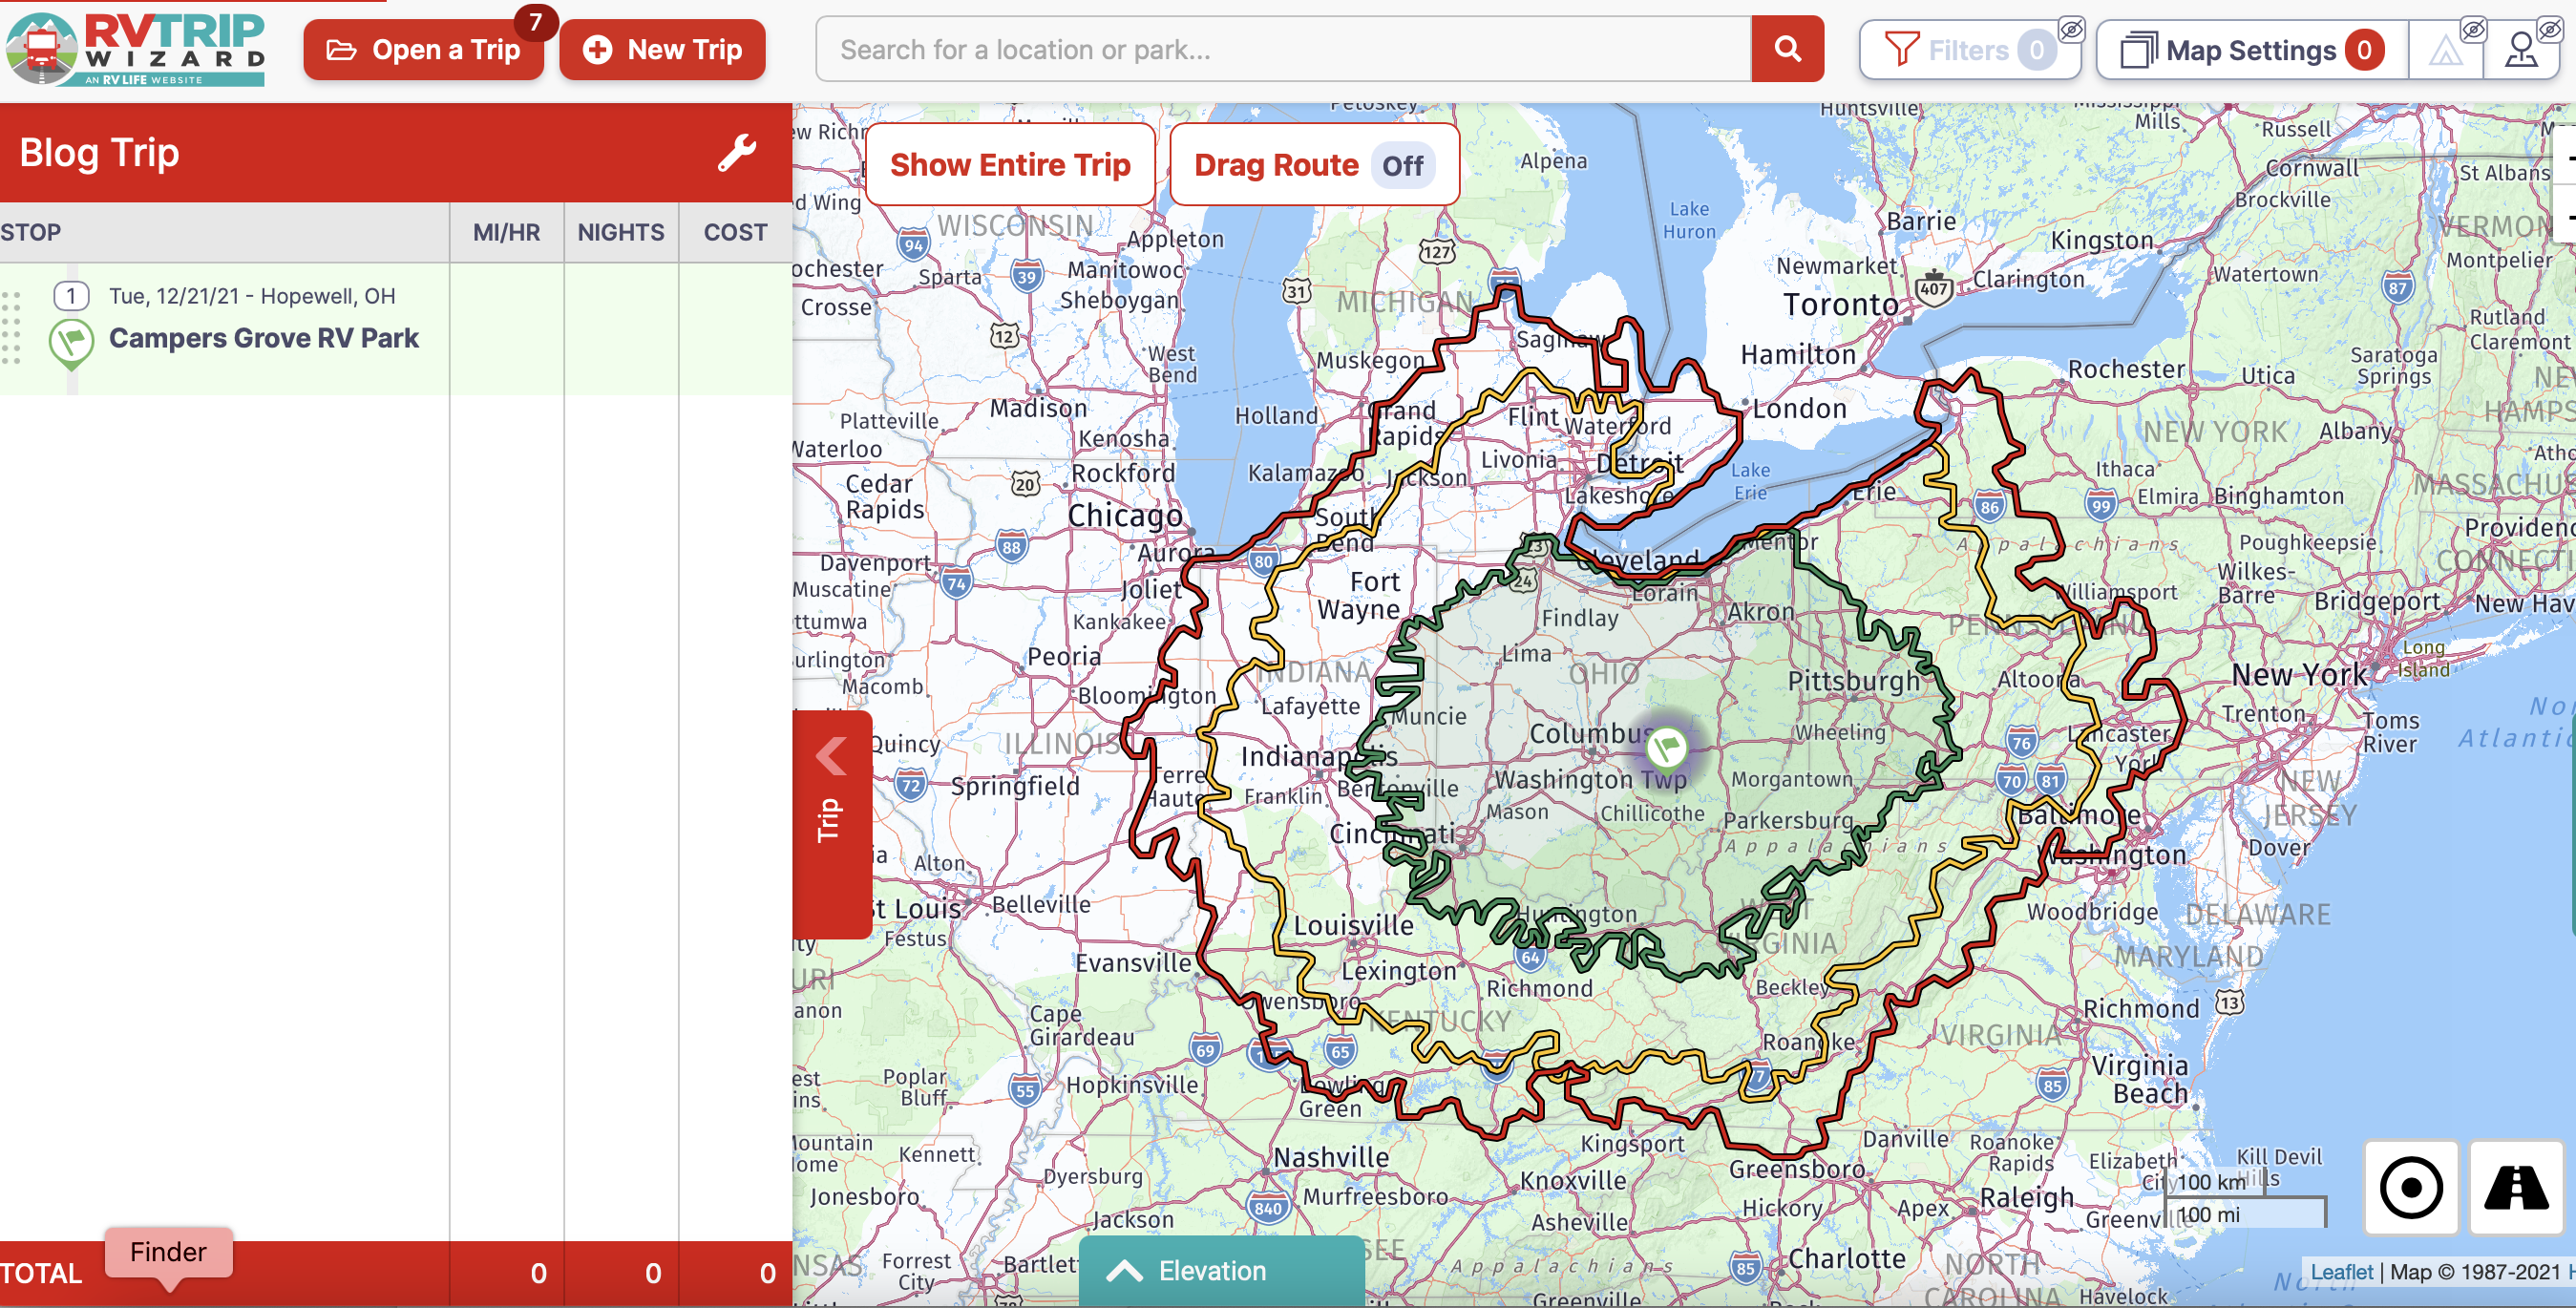
As I look at the map, I see the Green flag representing the location of Campers Grove RV Park. As I begin to zoom out, using the +/- buttons on the far right, I start seeing the three Advanced Driving Radius, one for each distance I entered under Routing & Driving (200, 300, and 350 miles). Now I know where I will need to stop to fuel up, somewhere near the Green Radius (200 miles), and where I might end up if I choose to drive 300 miles or 350 miles for the day.
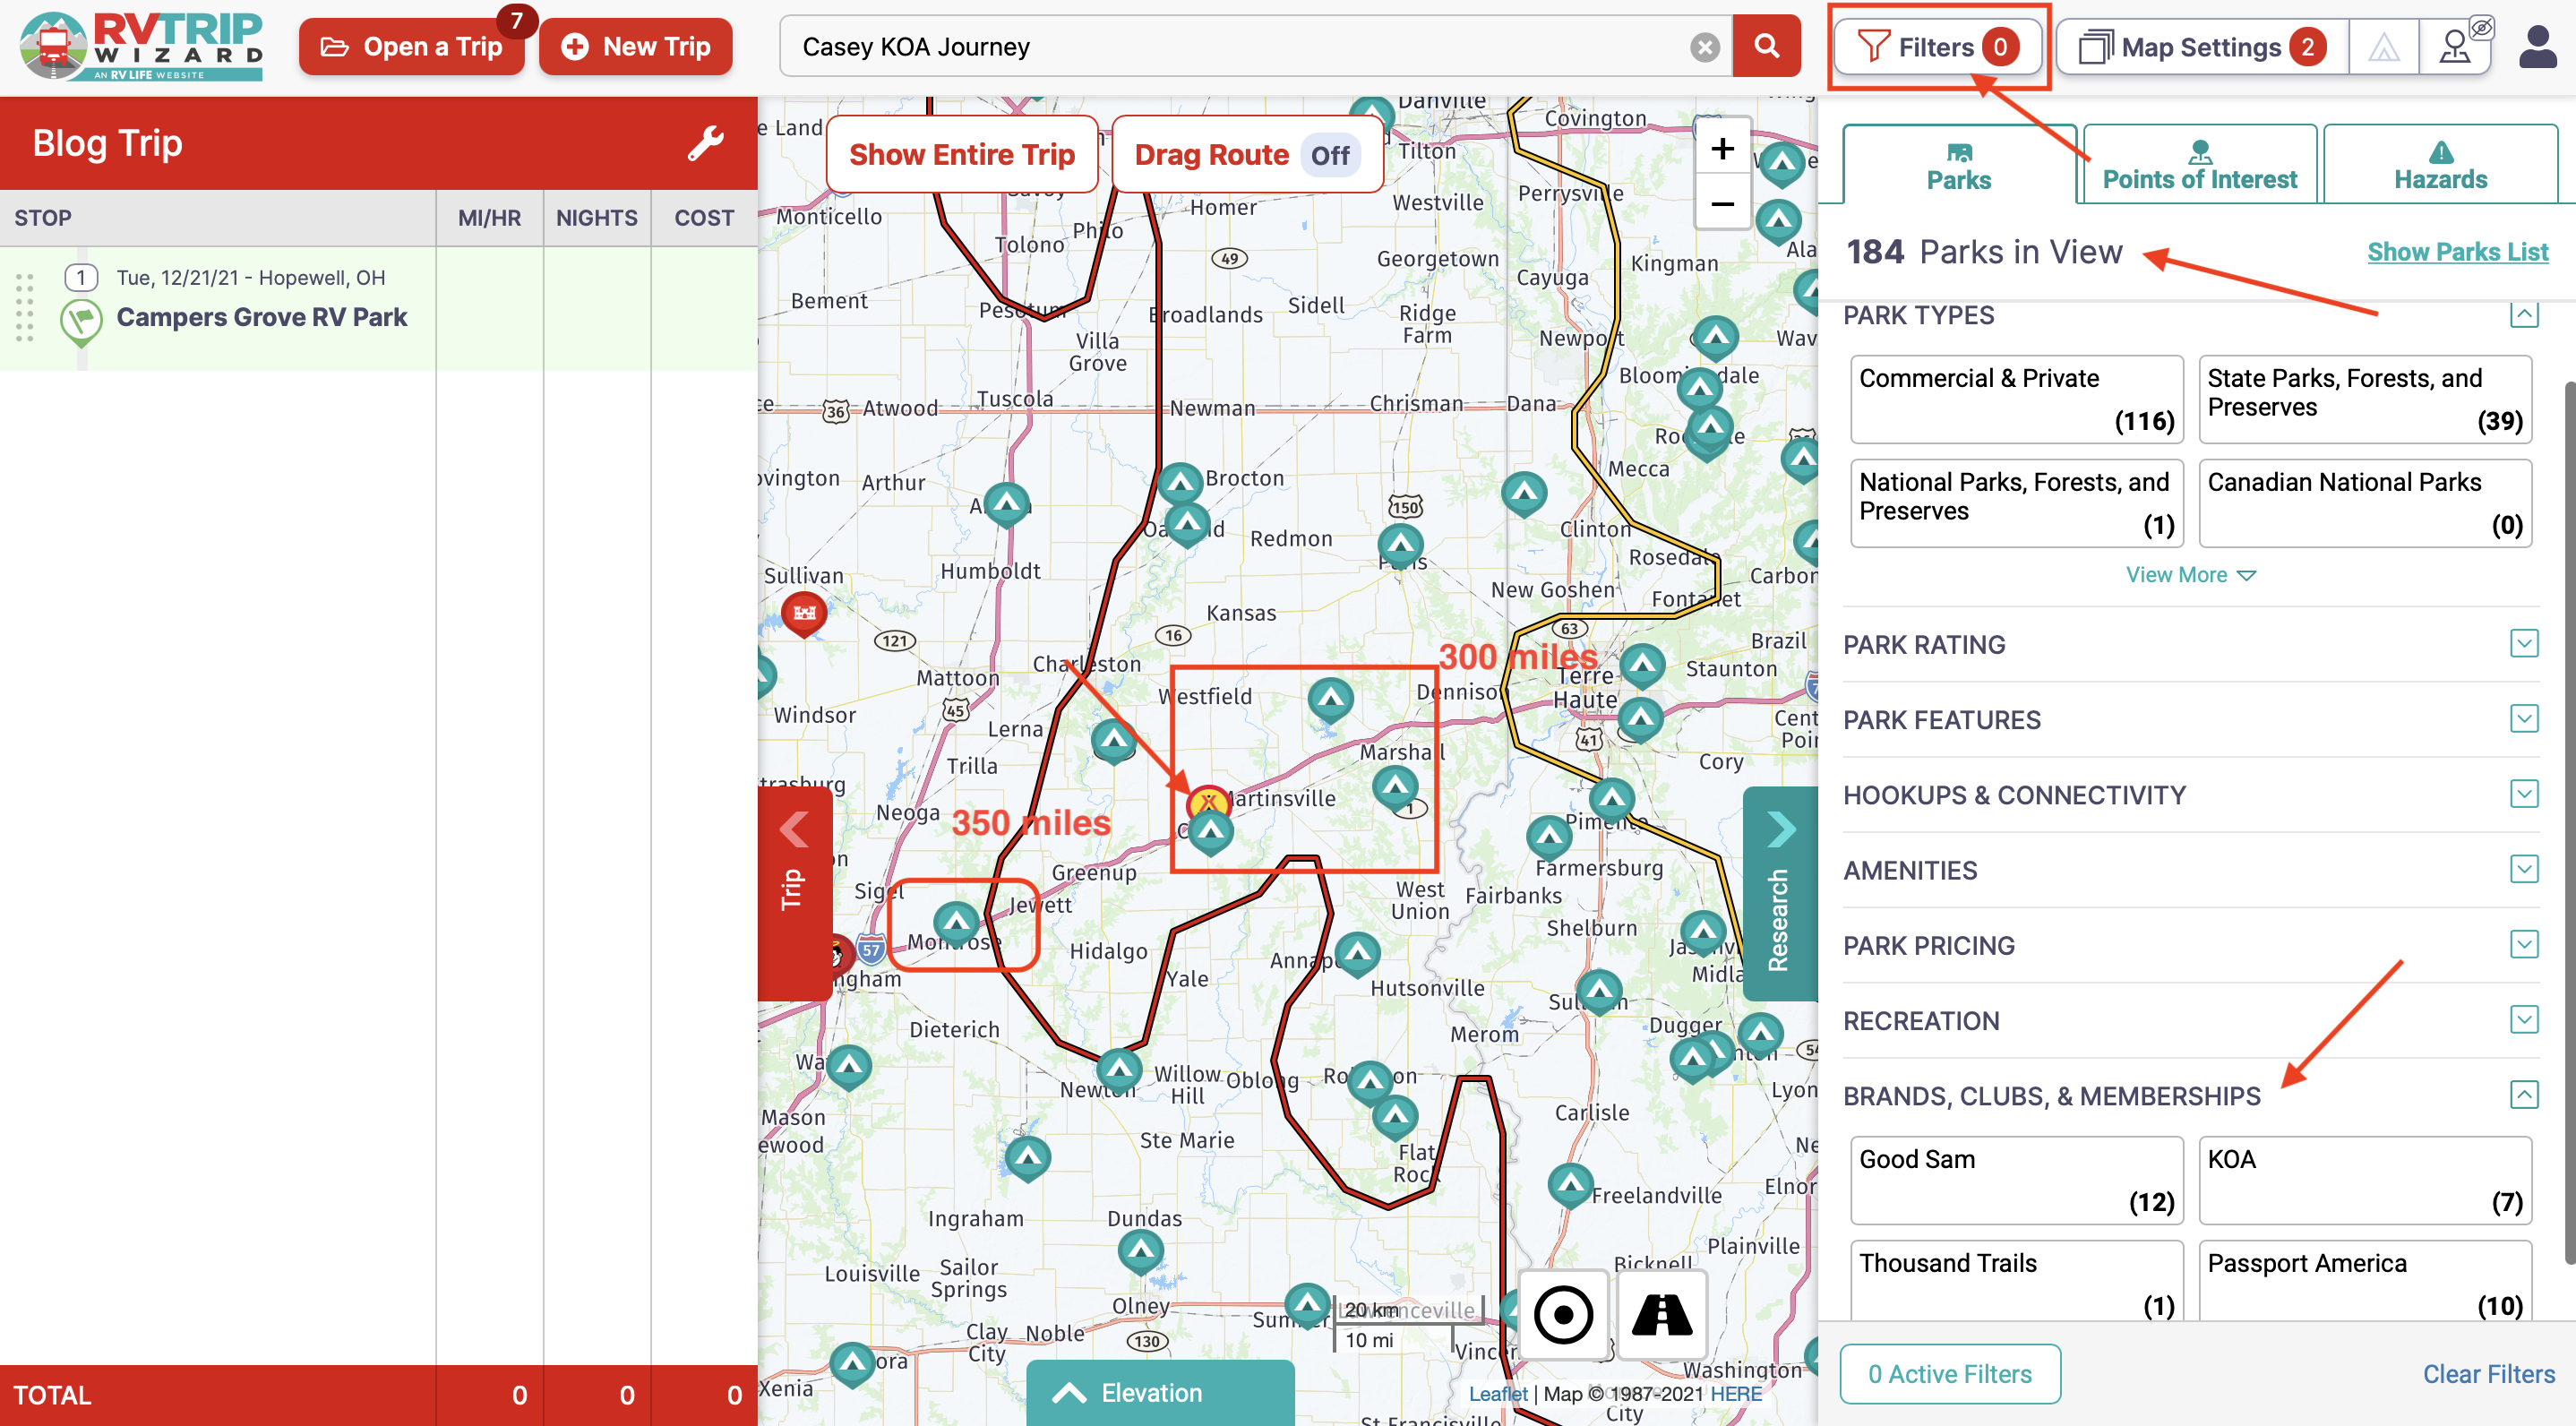
As I zoom in and turn on Filters and Points of Interest (POI). The map displays all the campgrounds in their database, based on the Park Types you select. As I am making my way to Pawhuska, OK, I zoom in on Interstate 70 and focus in on the 300 and 350 mile radius, figuring that is about as far as I would like to drive on this given day. I see five potential campgrounds along my route.
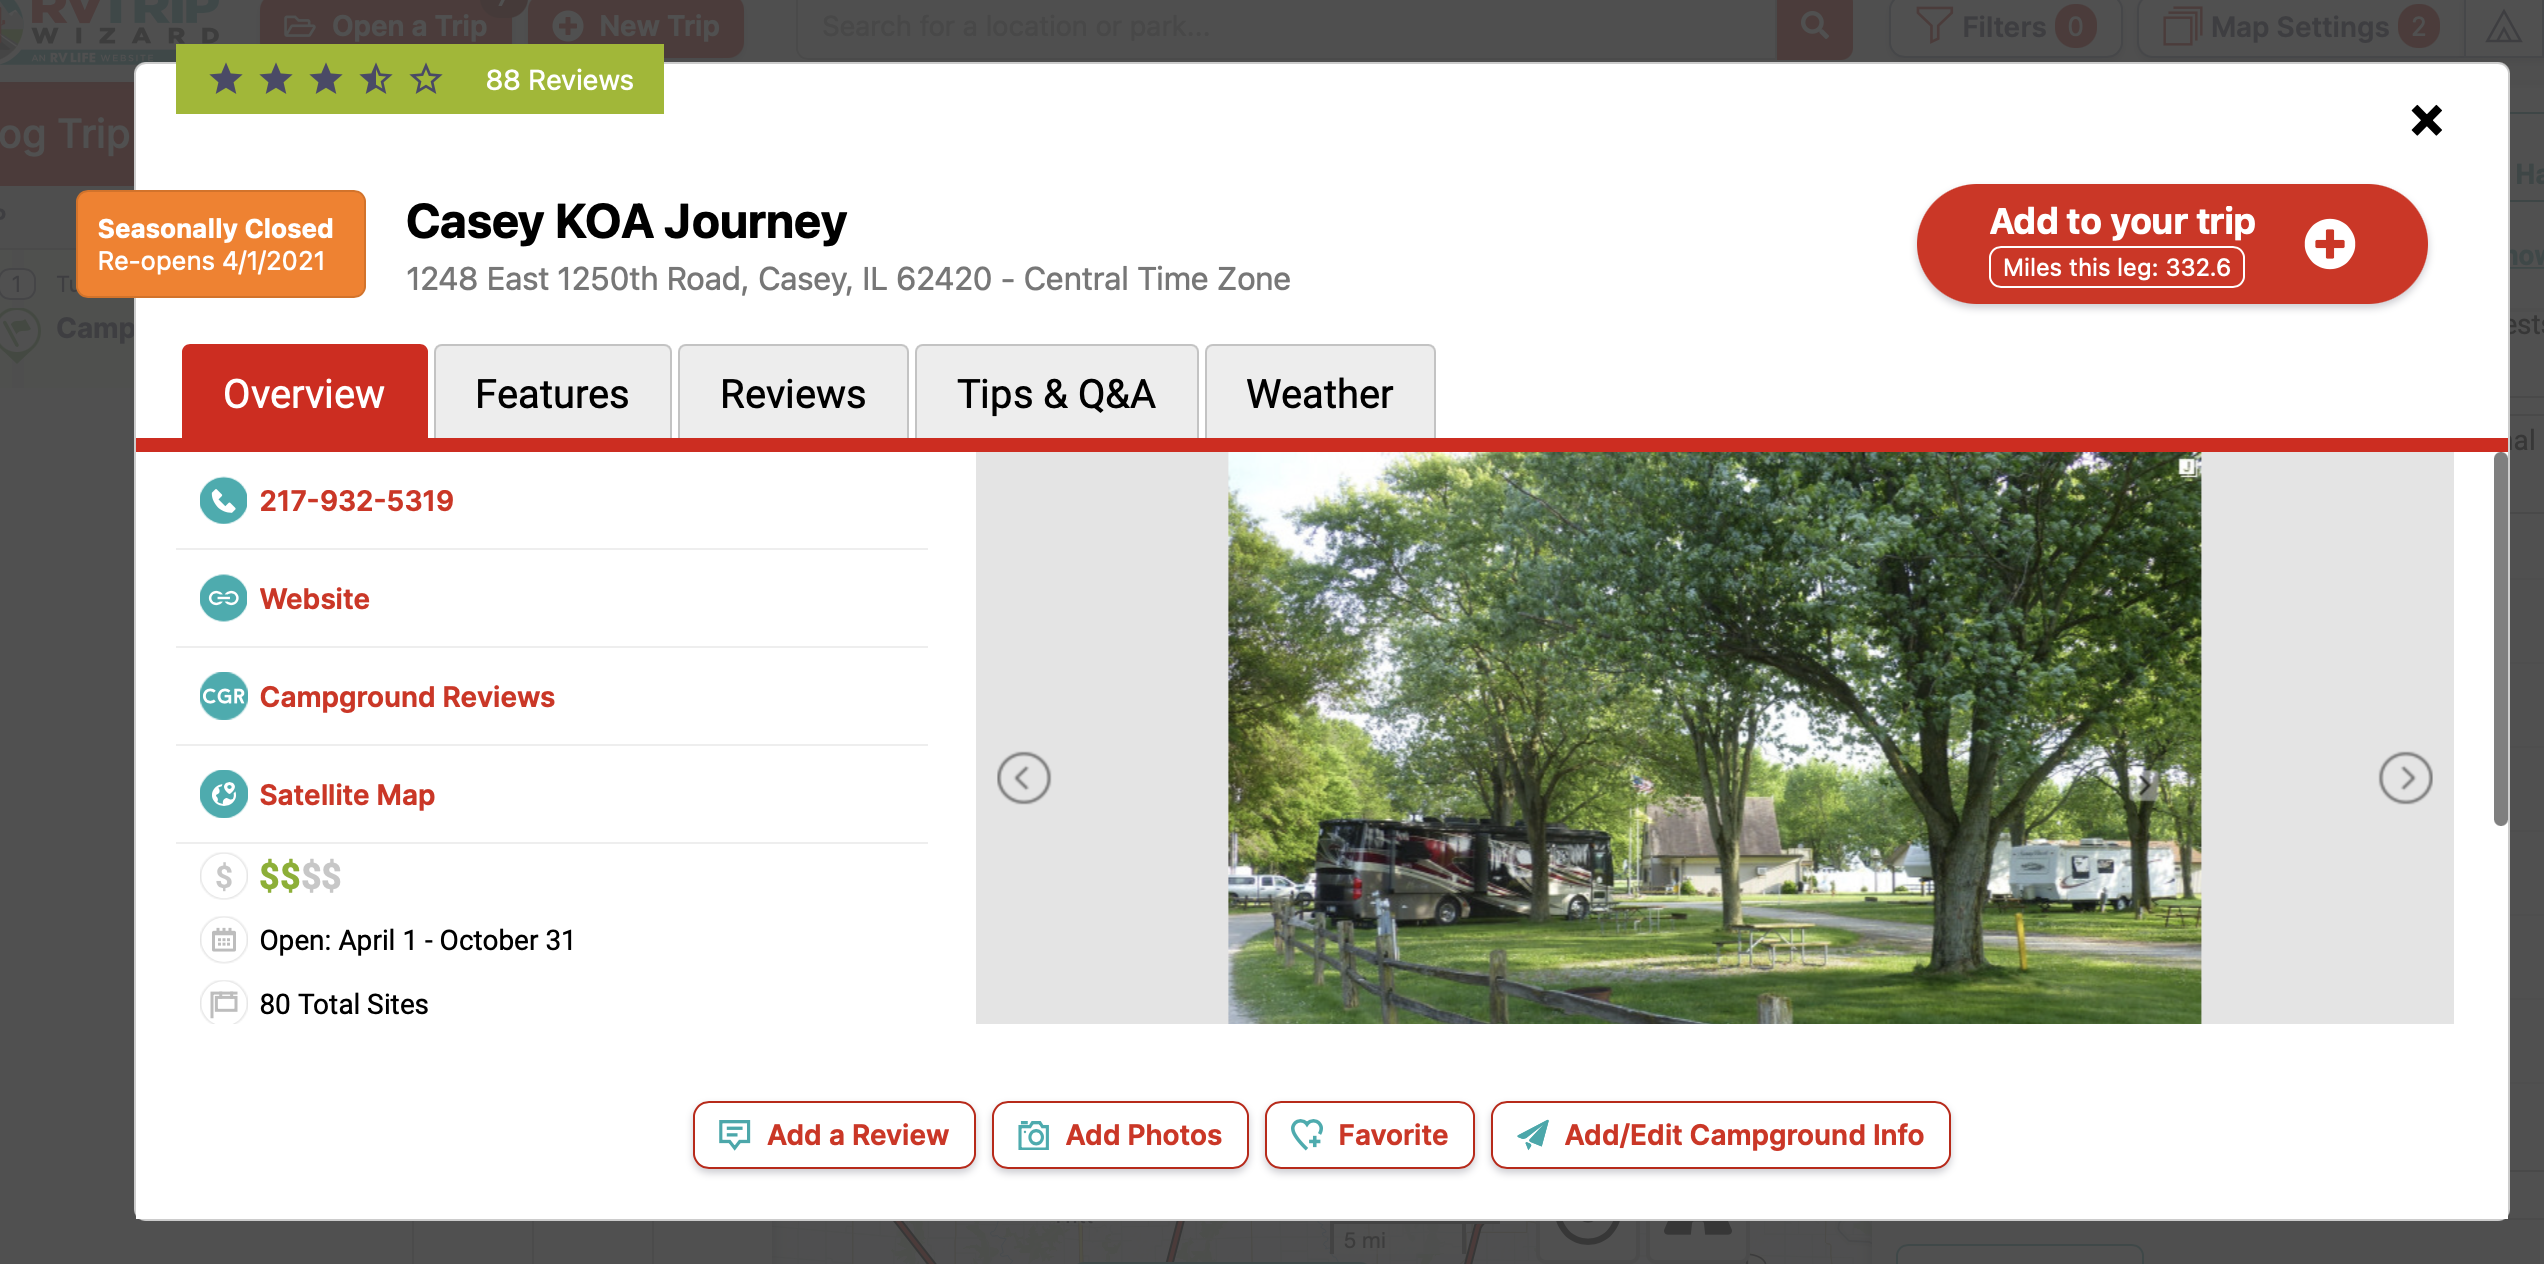
As I want to stay close to the highway, and am a KOA Member, I click on the KOA Icon shown on the map. A new window opens, and I click Add to Trip. I can add the number of nights I will stay here, in this case one. As I build out my personal trip, I will add the correct number of nights for each stay and the software provides a running total.
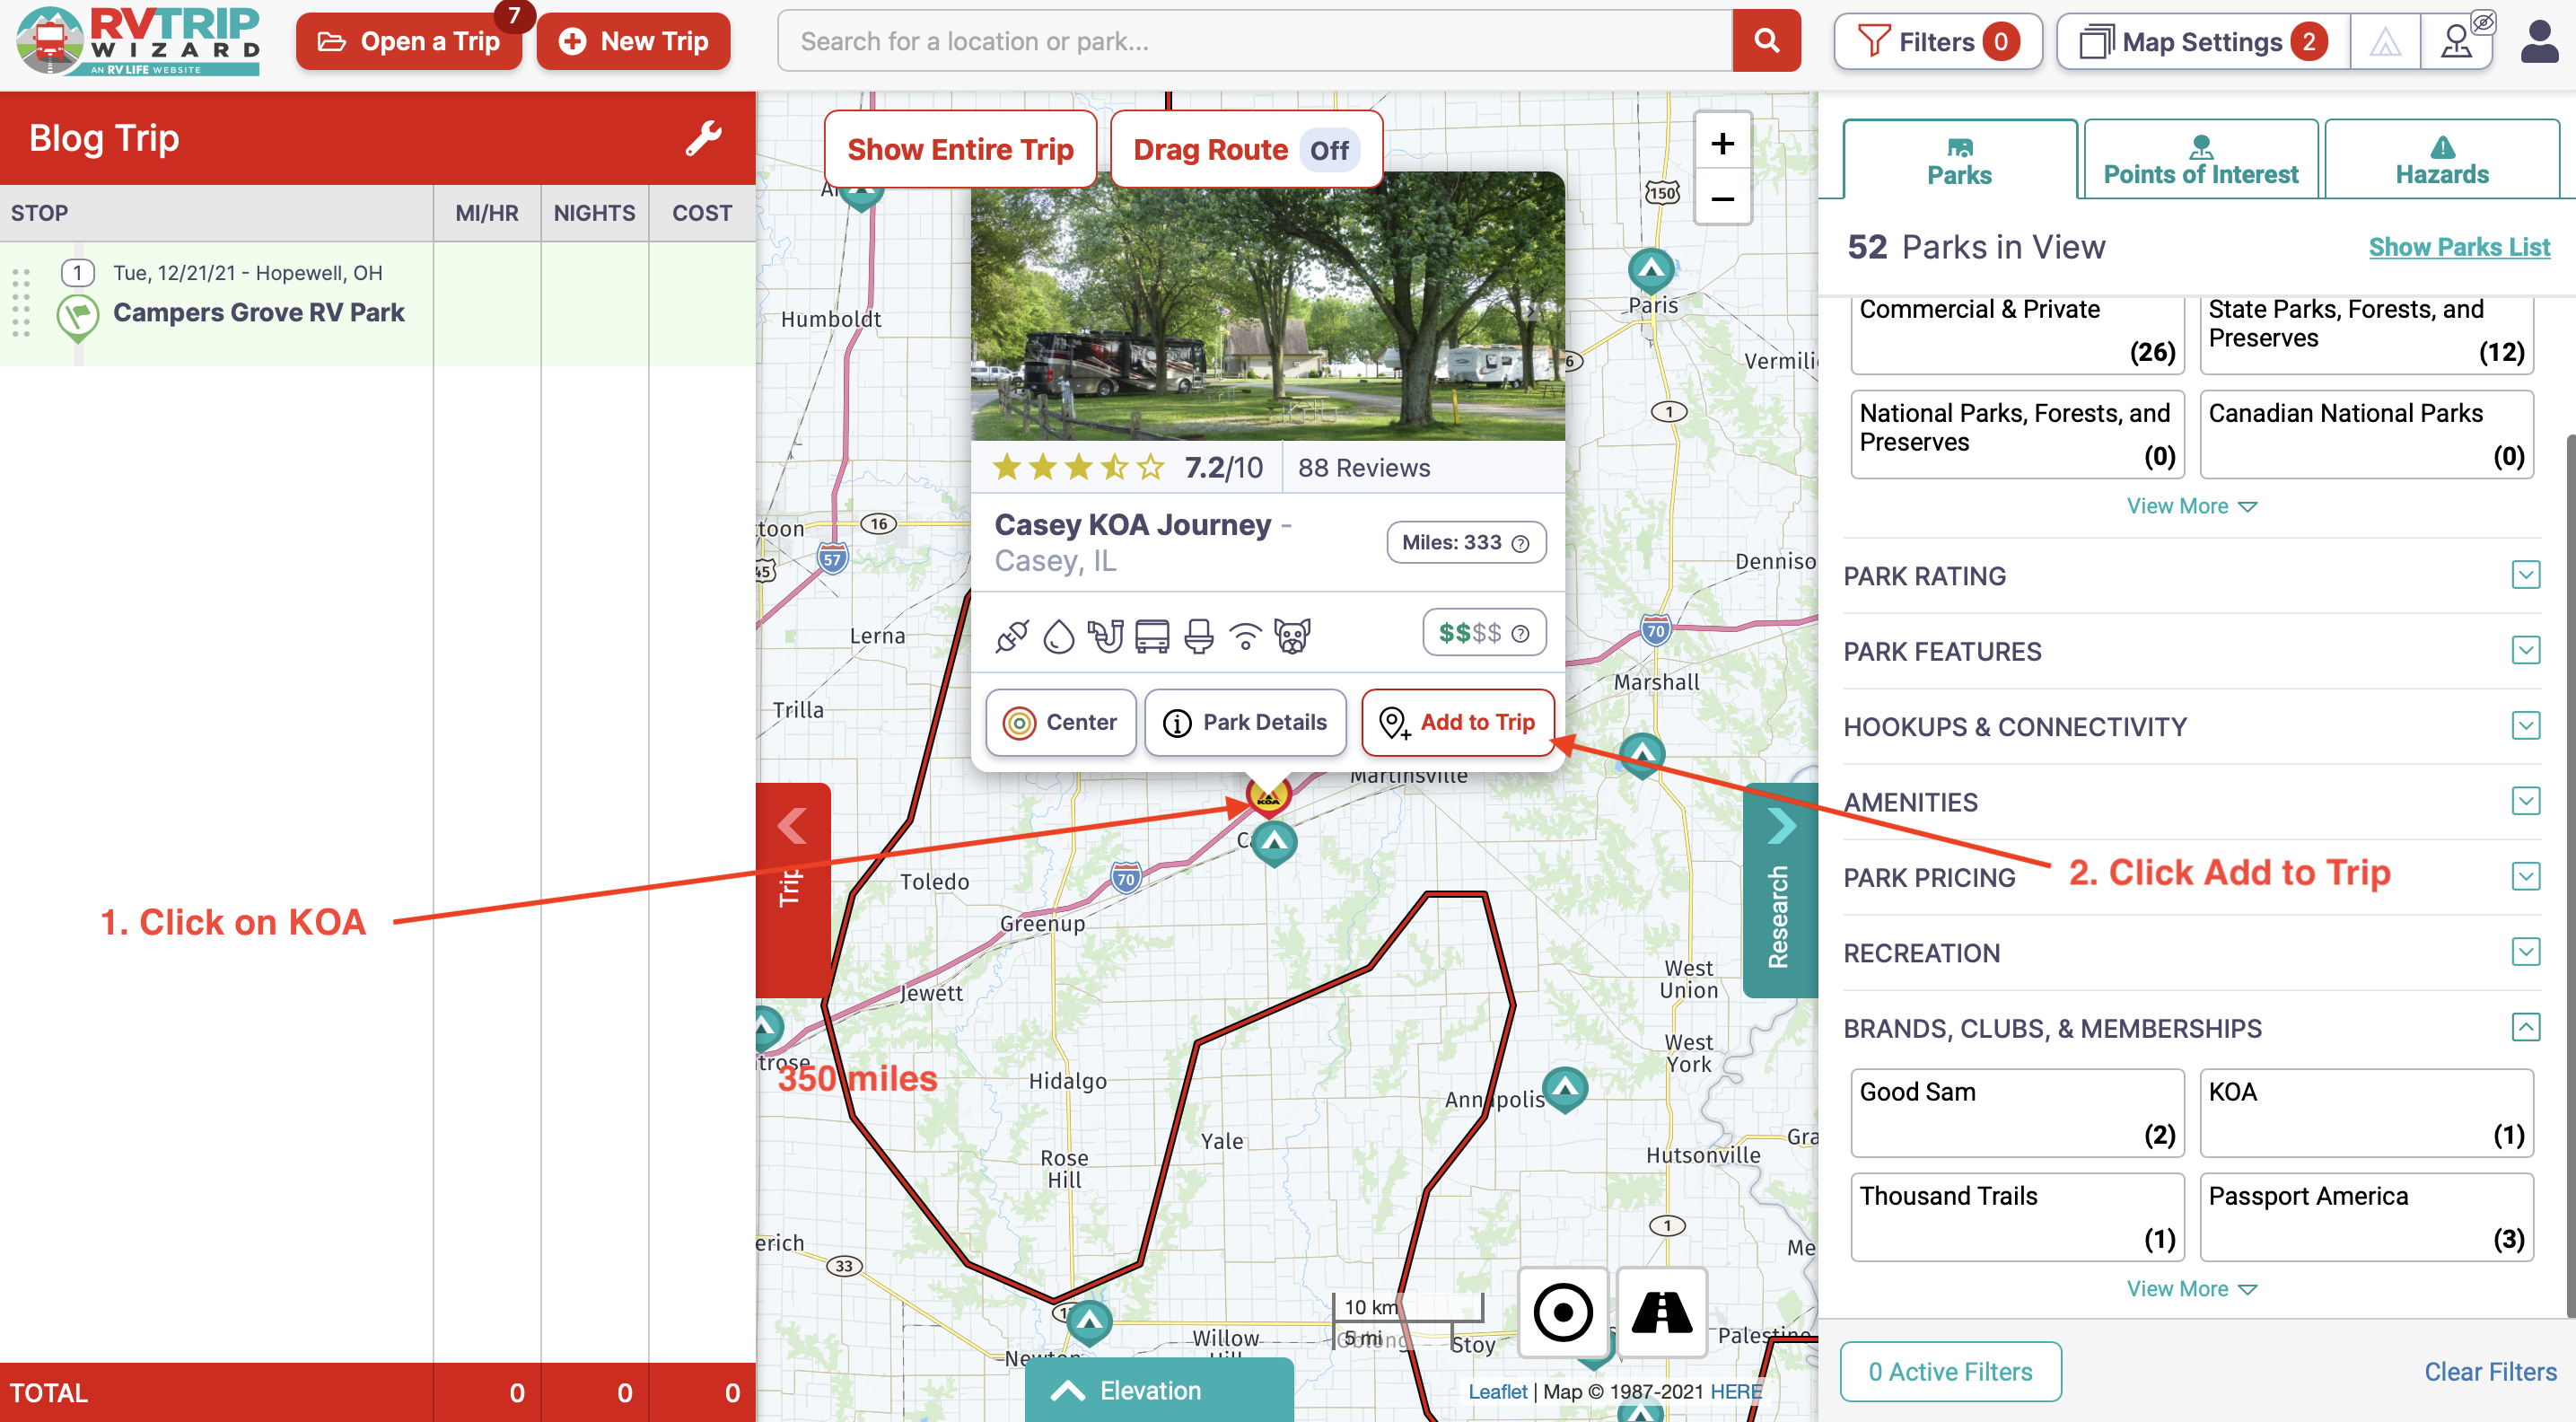
If I select Park Details, I will find reviews, a link to their website, and a lot of additional information. I always take note of the Star Rating and read through the reviews. I can also see this campground is 332.6 miles from my starting location, Campers Grove. Everything I could ask for while planning my trip.
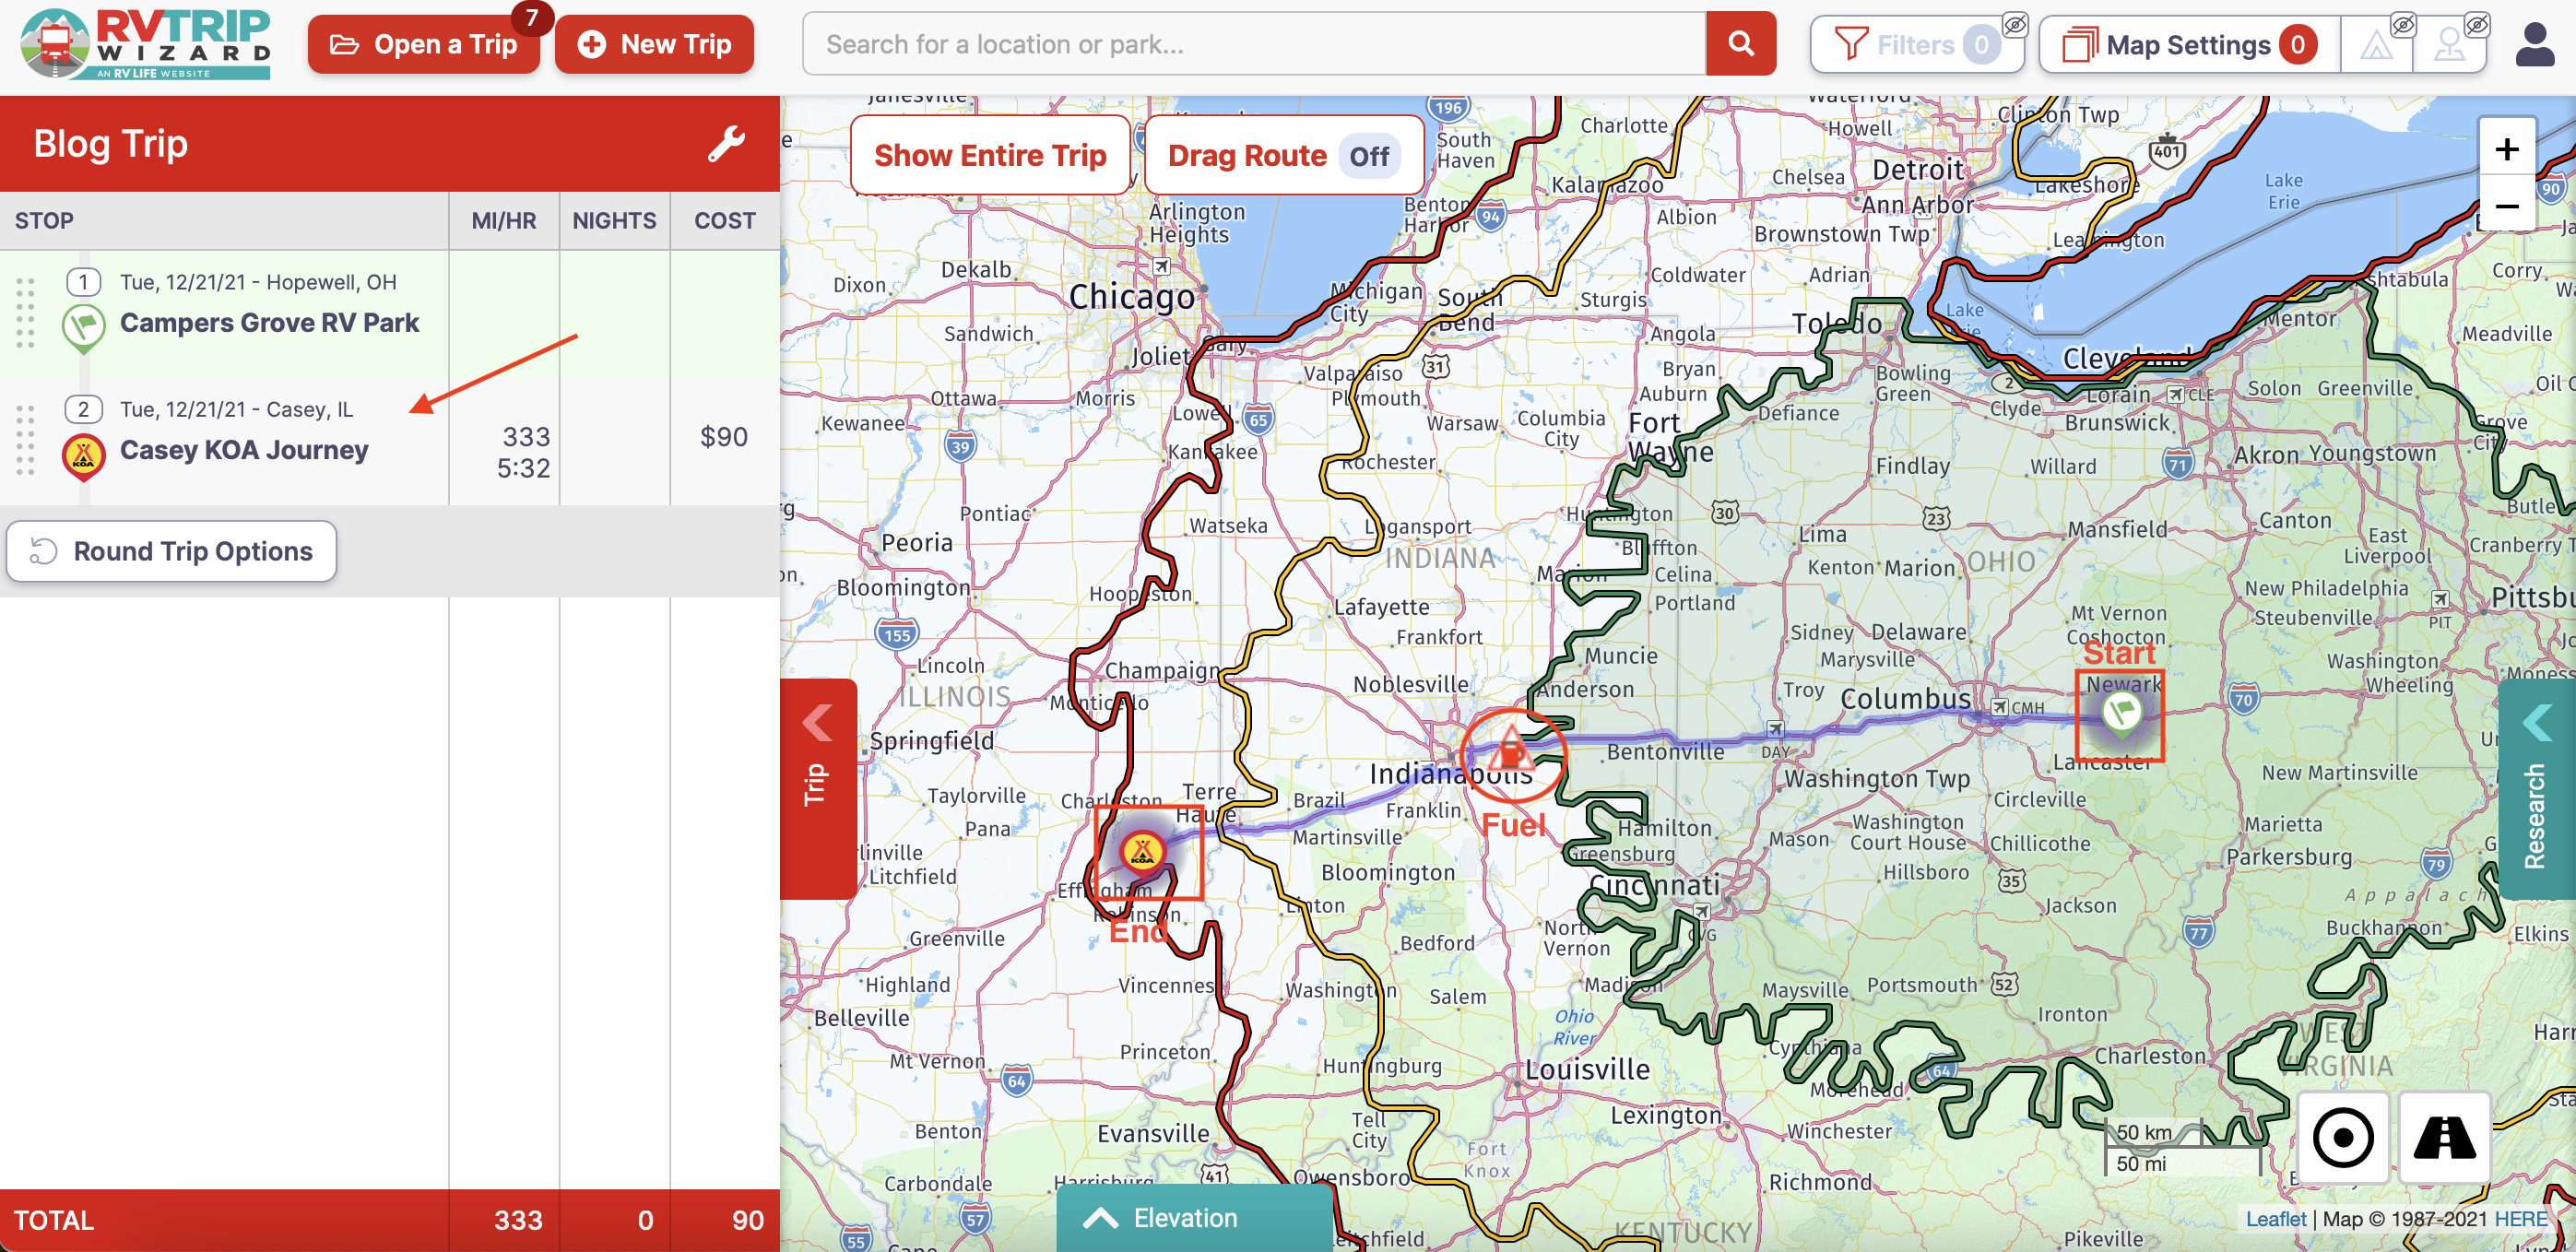
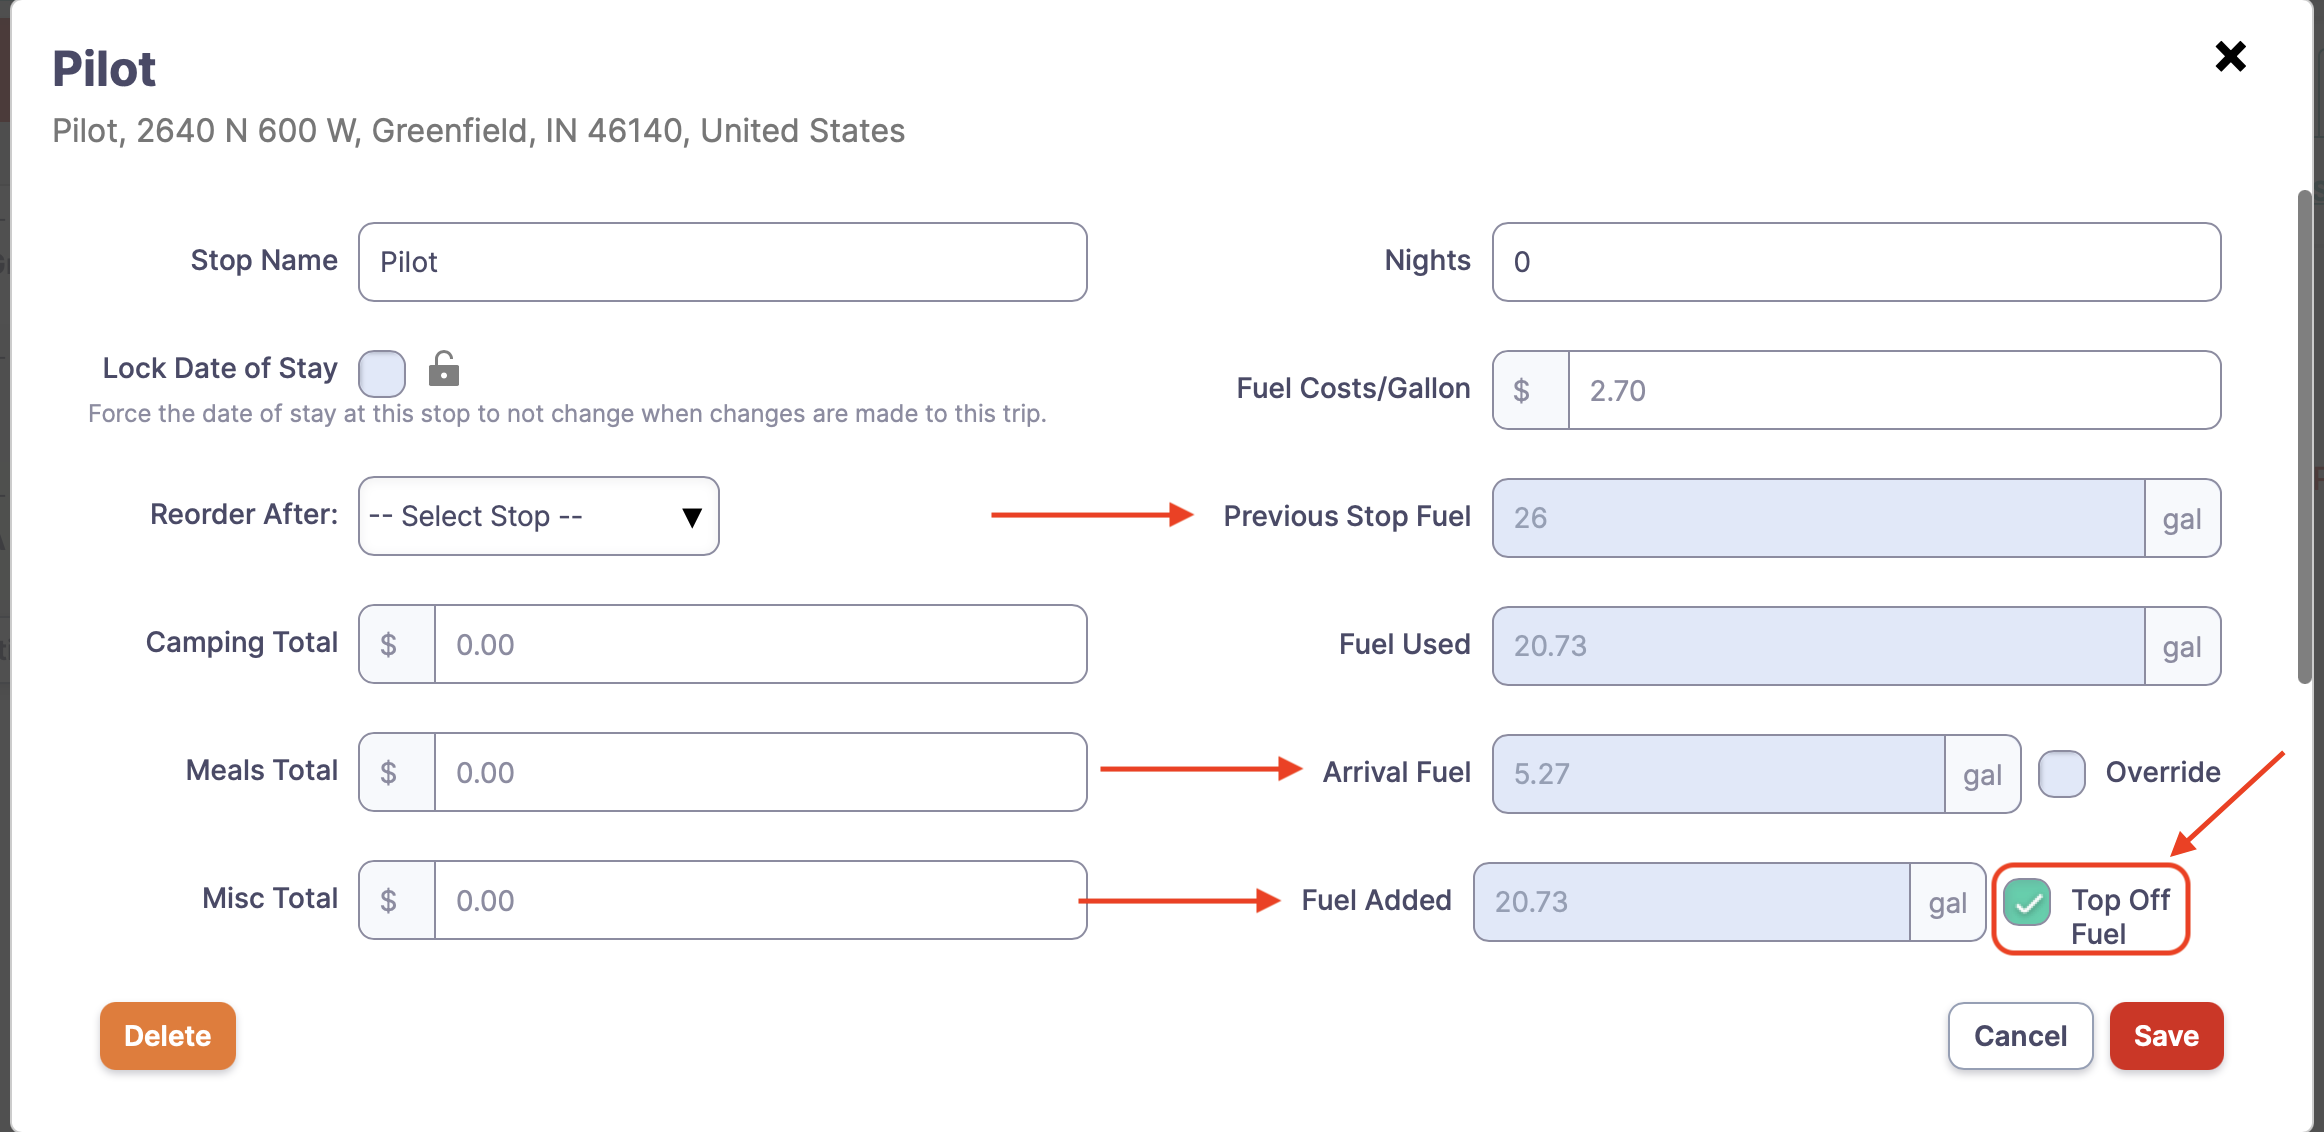
With Casey KOA added, the next thing I need to plan on is a fuel stop. If I click on my starting point under STOP and zoom out, I can see my entire trip. But this time I see a fuel pump icon (warning marker/low fuel indicator) on the map. This marker location is based on the data I entered under RV Information. If you recall, I provided my tank size as 26 gallons, Fuel economy as 10 mpg, and a reserve of 6 gallons. Based on this, the fuel pump icon should be about 200 miles from my starting point. As you can see from the Green Advanced Radius, which is set for 200 miles, the warning marker (low fuel indicator) is right where it should be. Perfect!
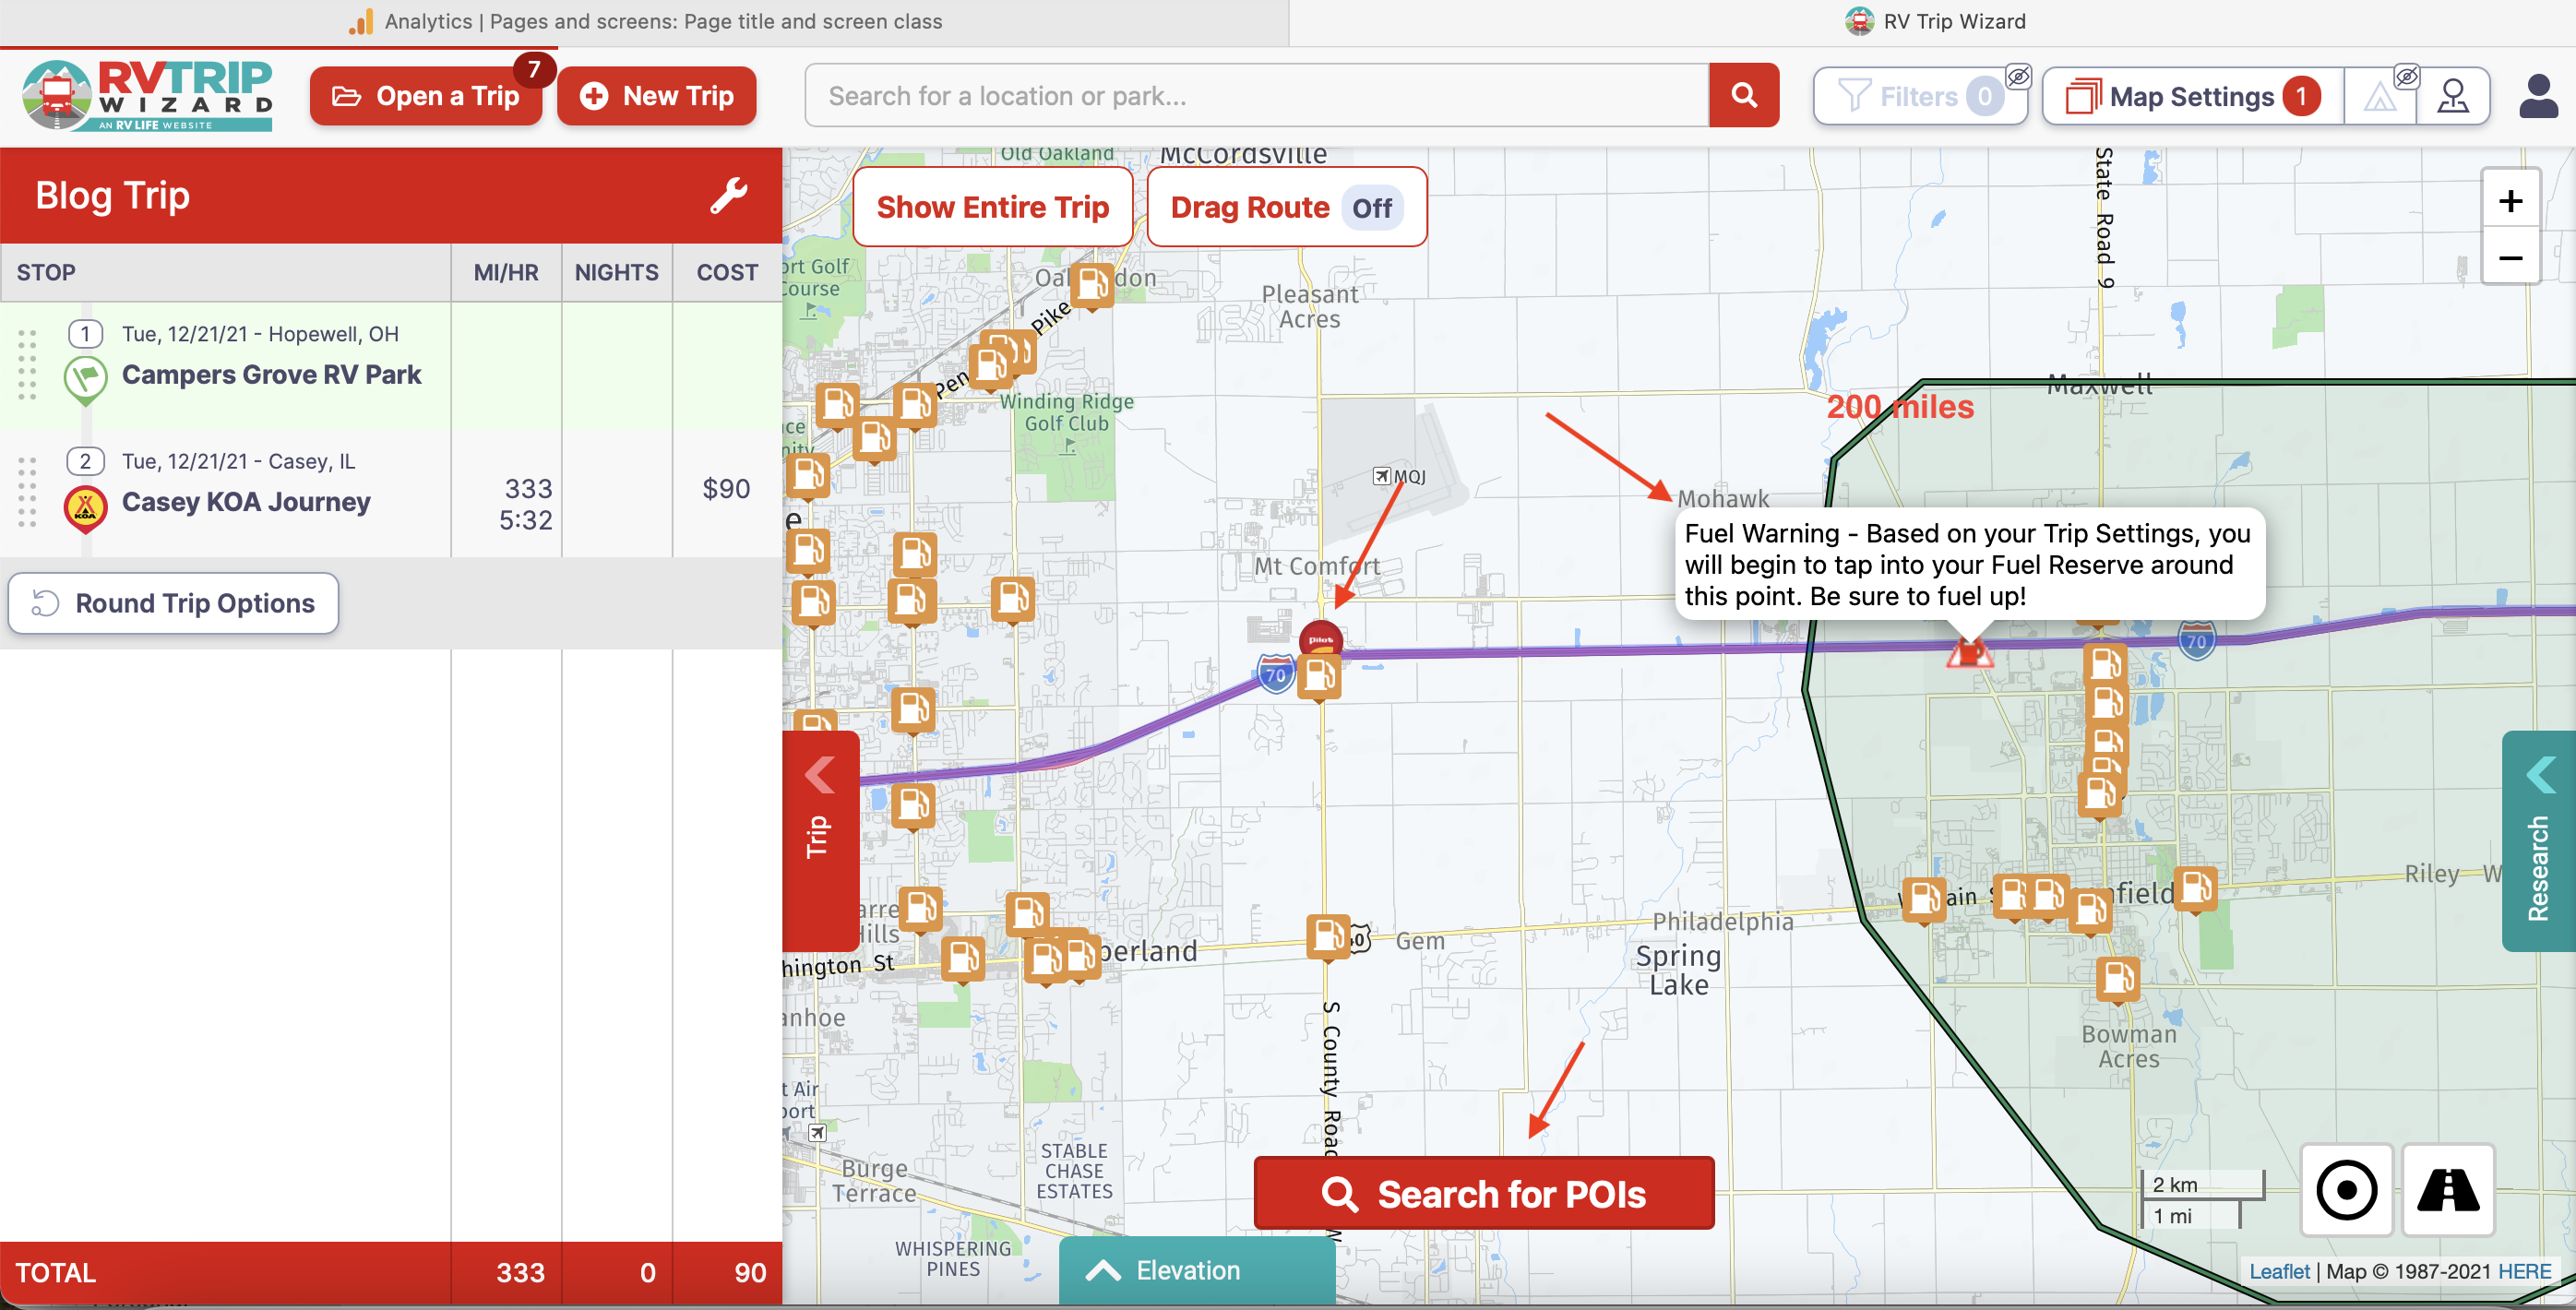
As I zoom in on the gas pump icon, I can now click on Search for POIs, and all the gas stations will appear. You will see the Fuel Warning note based on the Fuel Reserve information I entered. Knowing I have six gallons of fuel in reserve (or 60 miles), I select the Pilot icon on the map and a window pops up. At this point, I can click More Details for the address and click Add to your trip.
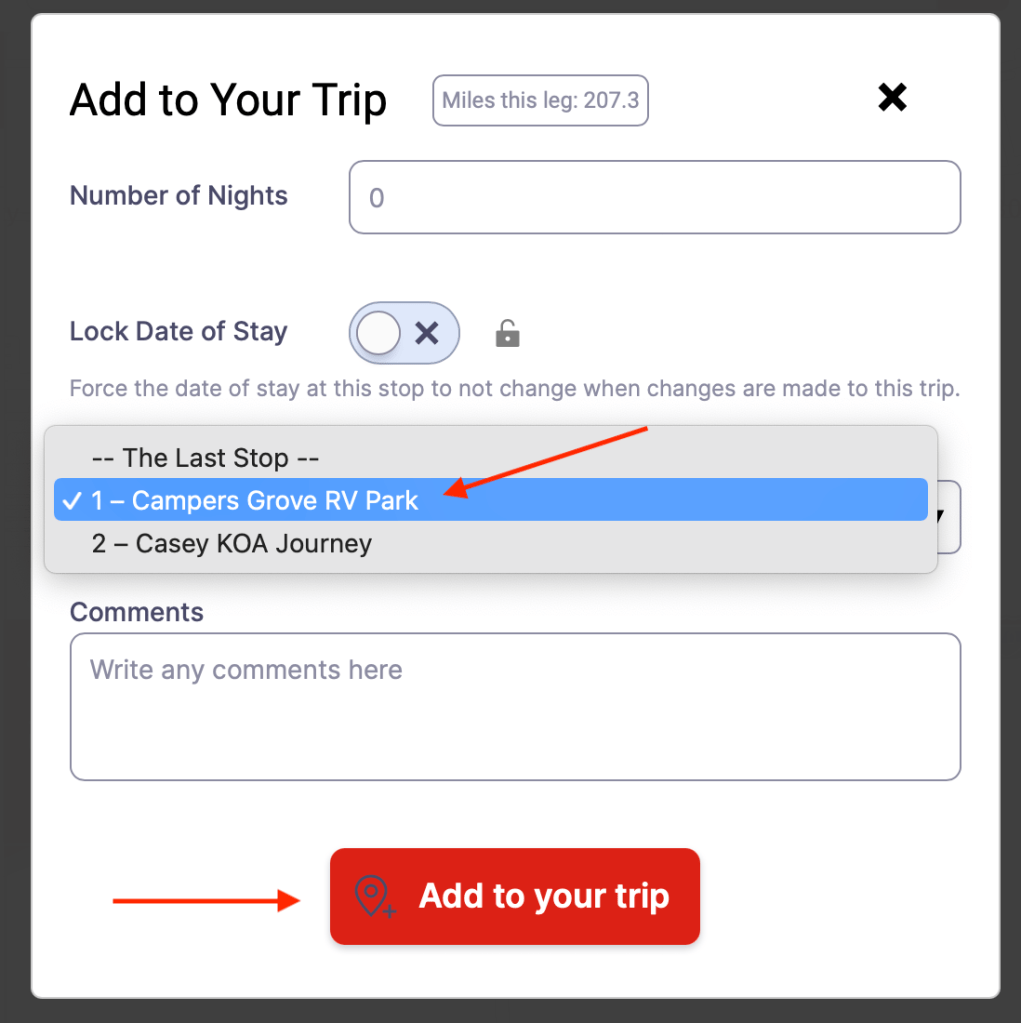
When I do, another window appears. I click the drop-down box under Add This Stop After Campers Grove RV Park. It is then added to my trip stops.
As a side note, to continue receiving the Fuel Marker/low fuel indicator at the correct locations, make sure you click the Pilot stop on your STOPS list. Click edit and check Top Off Fuel if you filled up. You can manually enter the amount of fuel added by filling in the appropriate fields if you did not fill up.
With the fuel stop added, I can zoom out to see my complete trip. I now have one completed leg of my trip planned. All I have to do is repeat this process for each leg of our entire trip.
In total, I entered 54 stops, which consisted of 98 nights over three months. Below is my complete RV Trip Wizard trip map.
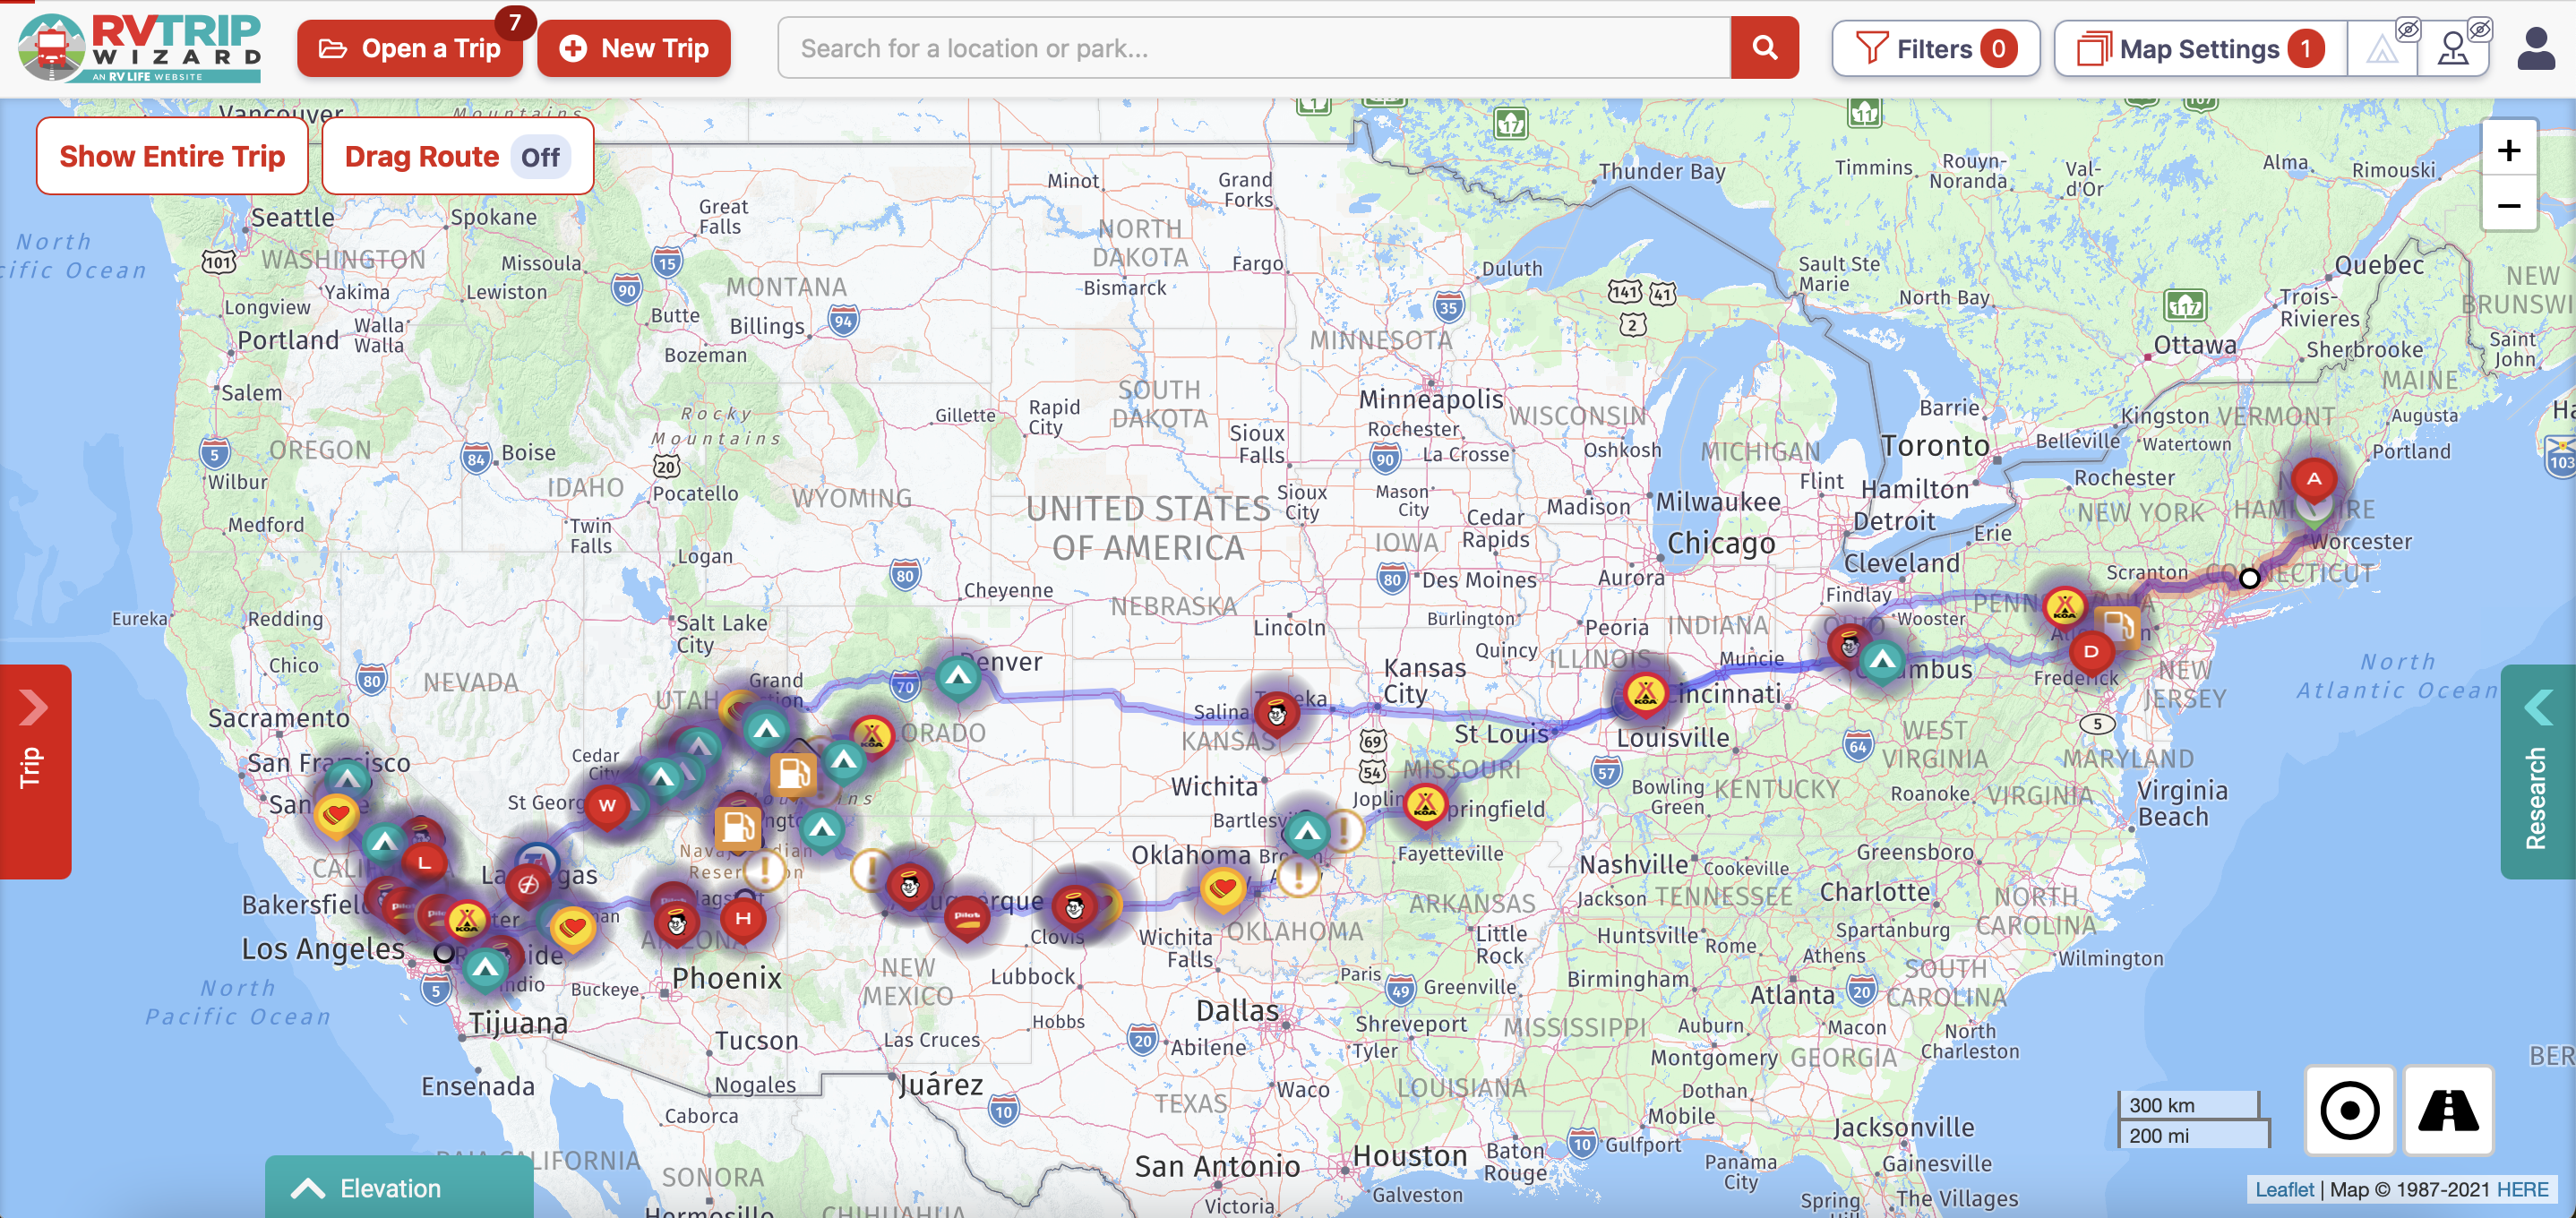
This software helped address all my RV trip planning concerns. With the help of the Advanced Driving Radius, I could determine my route, locate potential campgrounds within their database, and find gas stations.
There are plenty of Points Of Interest (POI) that can be filtered and added to the map feature, such as Attractions, Restaurants, Malls, Bass Pro Shops, Walmart, and more. These will all show up on the map once you zoom in close enough and click on the Search for POI button at the bottom of the map. Make sure you have the desired filters identified when planning your trip. If your map gets too cluttered, with a single click of a button you can turn this feature off. It truly is a pleasant interface for trip planning.
As my travel experience improves, I can fine-tune my data in the settings, improving my overall travel experience thanks to this software.
I hope this example shows the power of this software and how using the features can assist in your RV travel planning. This truly is a phenomenal RV trip planning tool!
